How to add Compliance Documents for Staff?
The Compliance feature in Maxpilot ensures that all essential staff certifications, training records, and safety documents are properly uploaded, tracked, and up to date.
Each compliance file added under a staff profile automatically appears in the Documents section, keeping both areas synchronized for transparency and easy access.
This section helps administrators verify that all necessary documents for each staff member are valid and up to date.
Step 1: Navigate to the Staff List
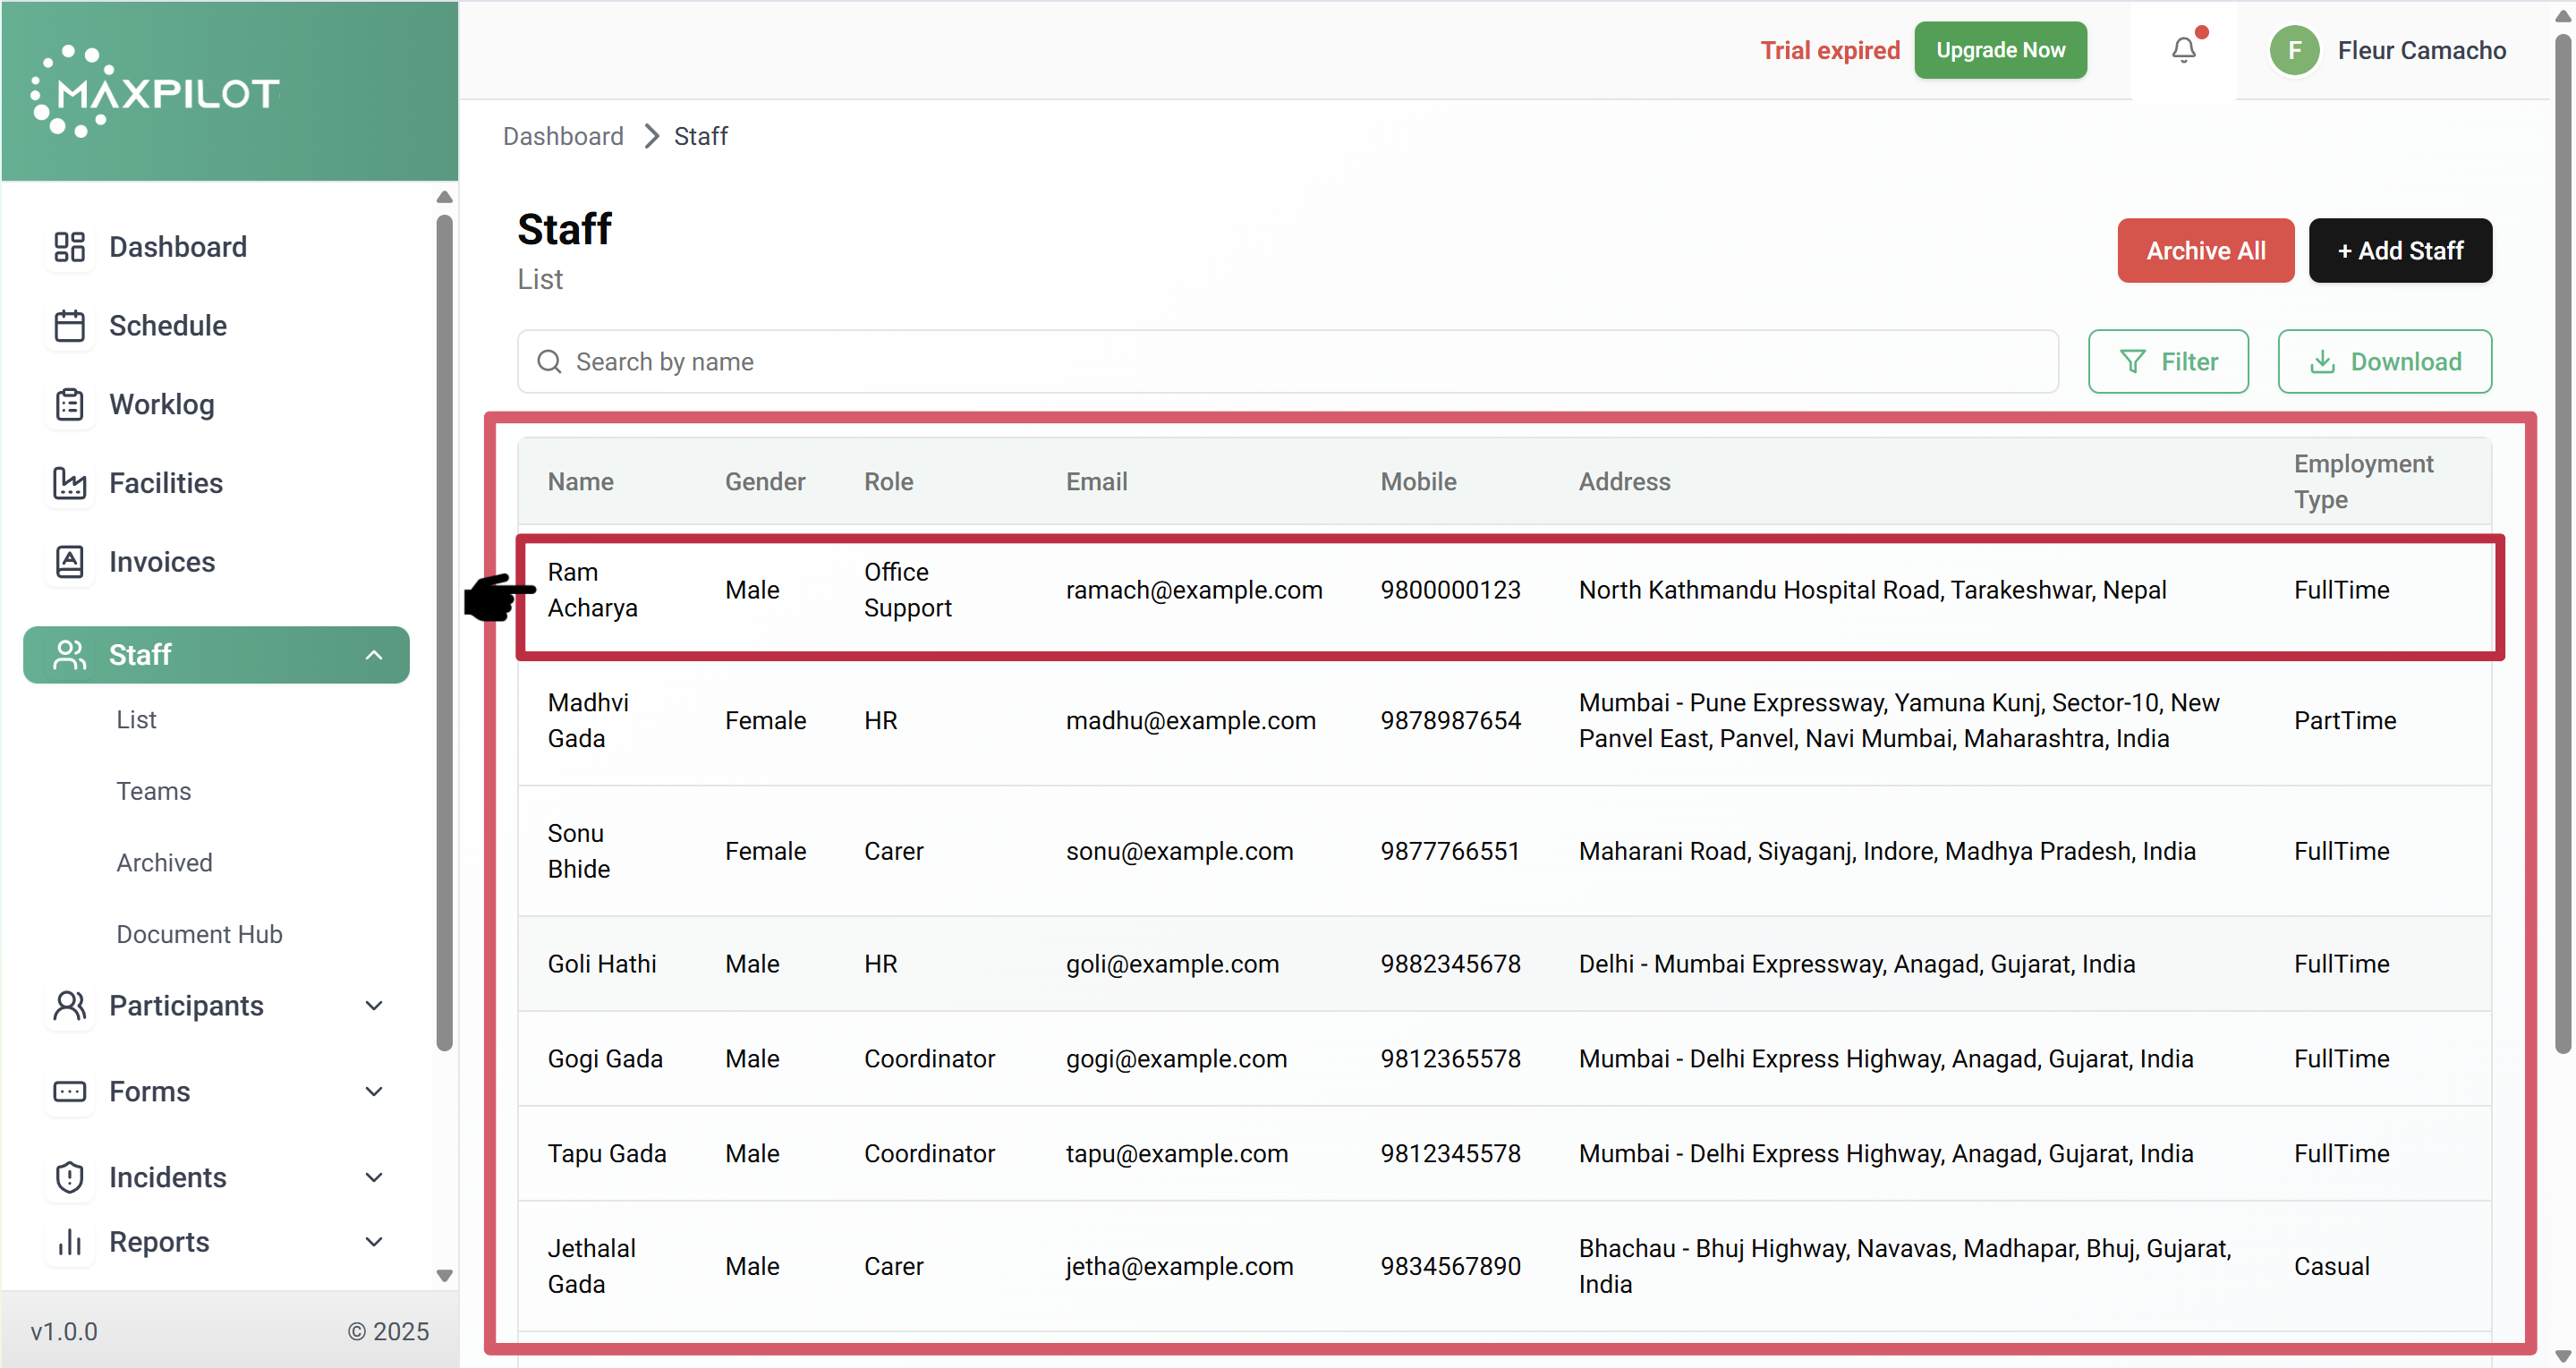
From the left-hand side menu, click on Staff → List.
Here, you will see a table displaying all staff members, including their name, role, contact details, and employment type.
Select the staff member for whom you wish to upload compliance documents (e.g., Ram Acharya).
Step 2: Open the Compliance Tab
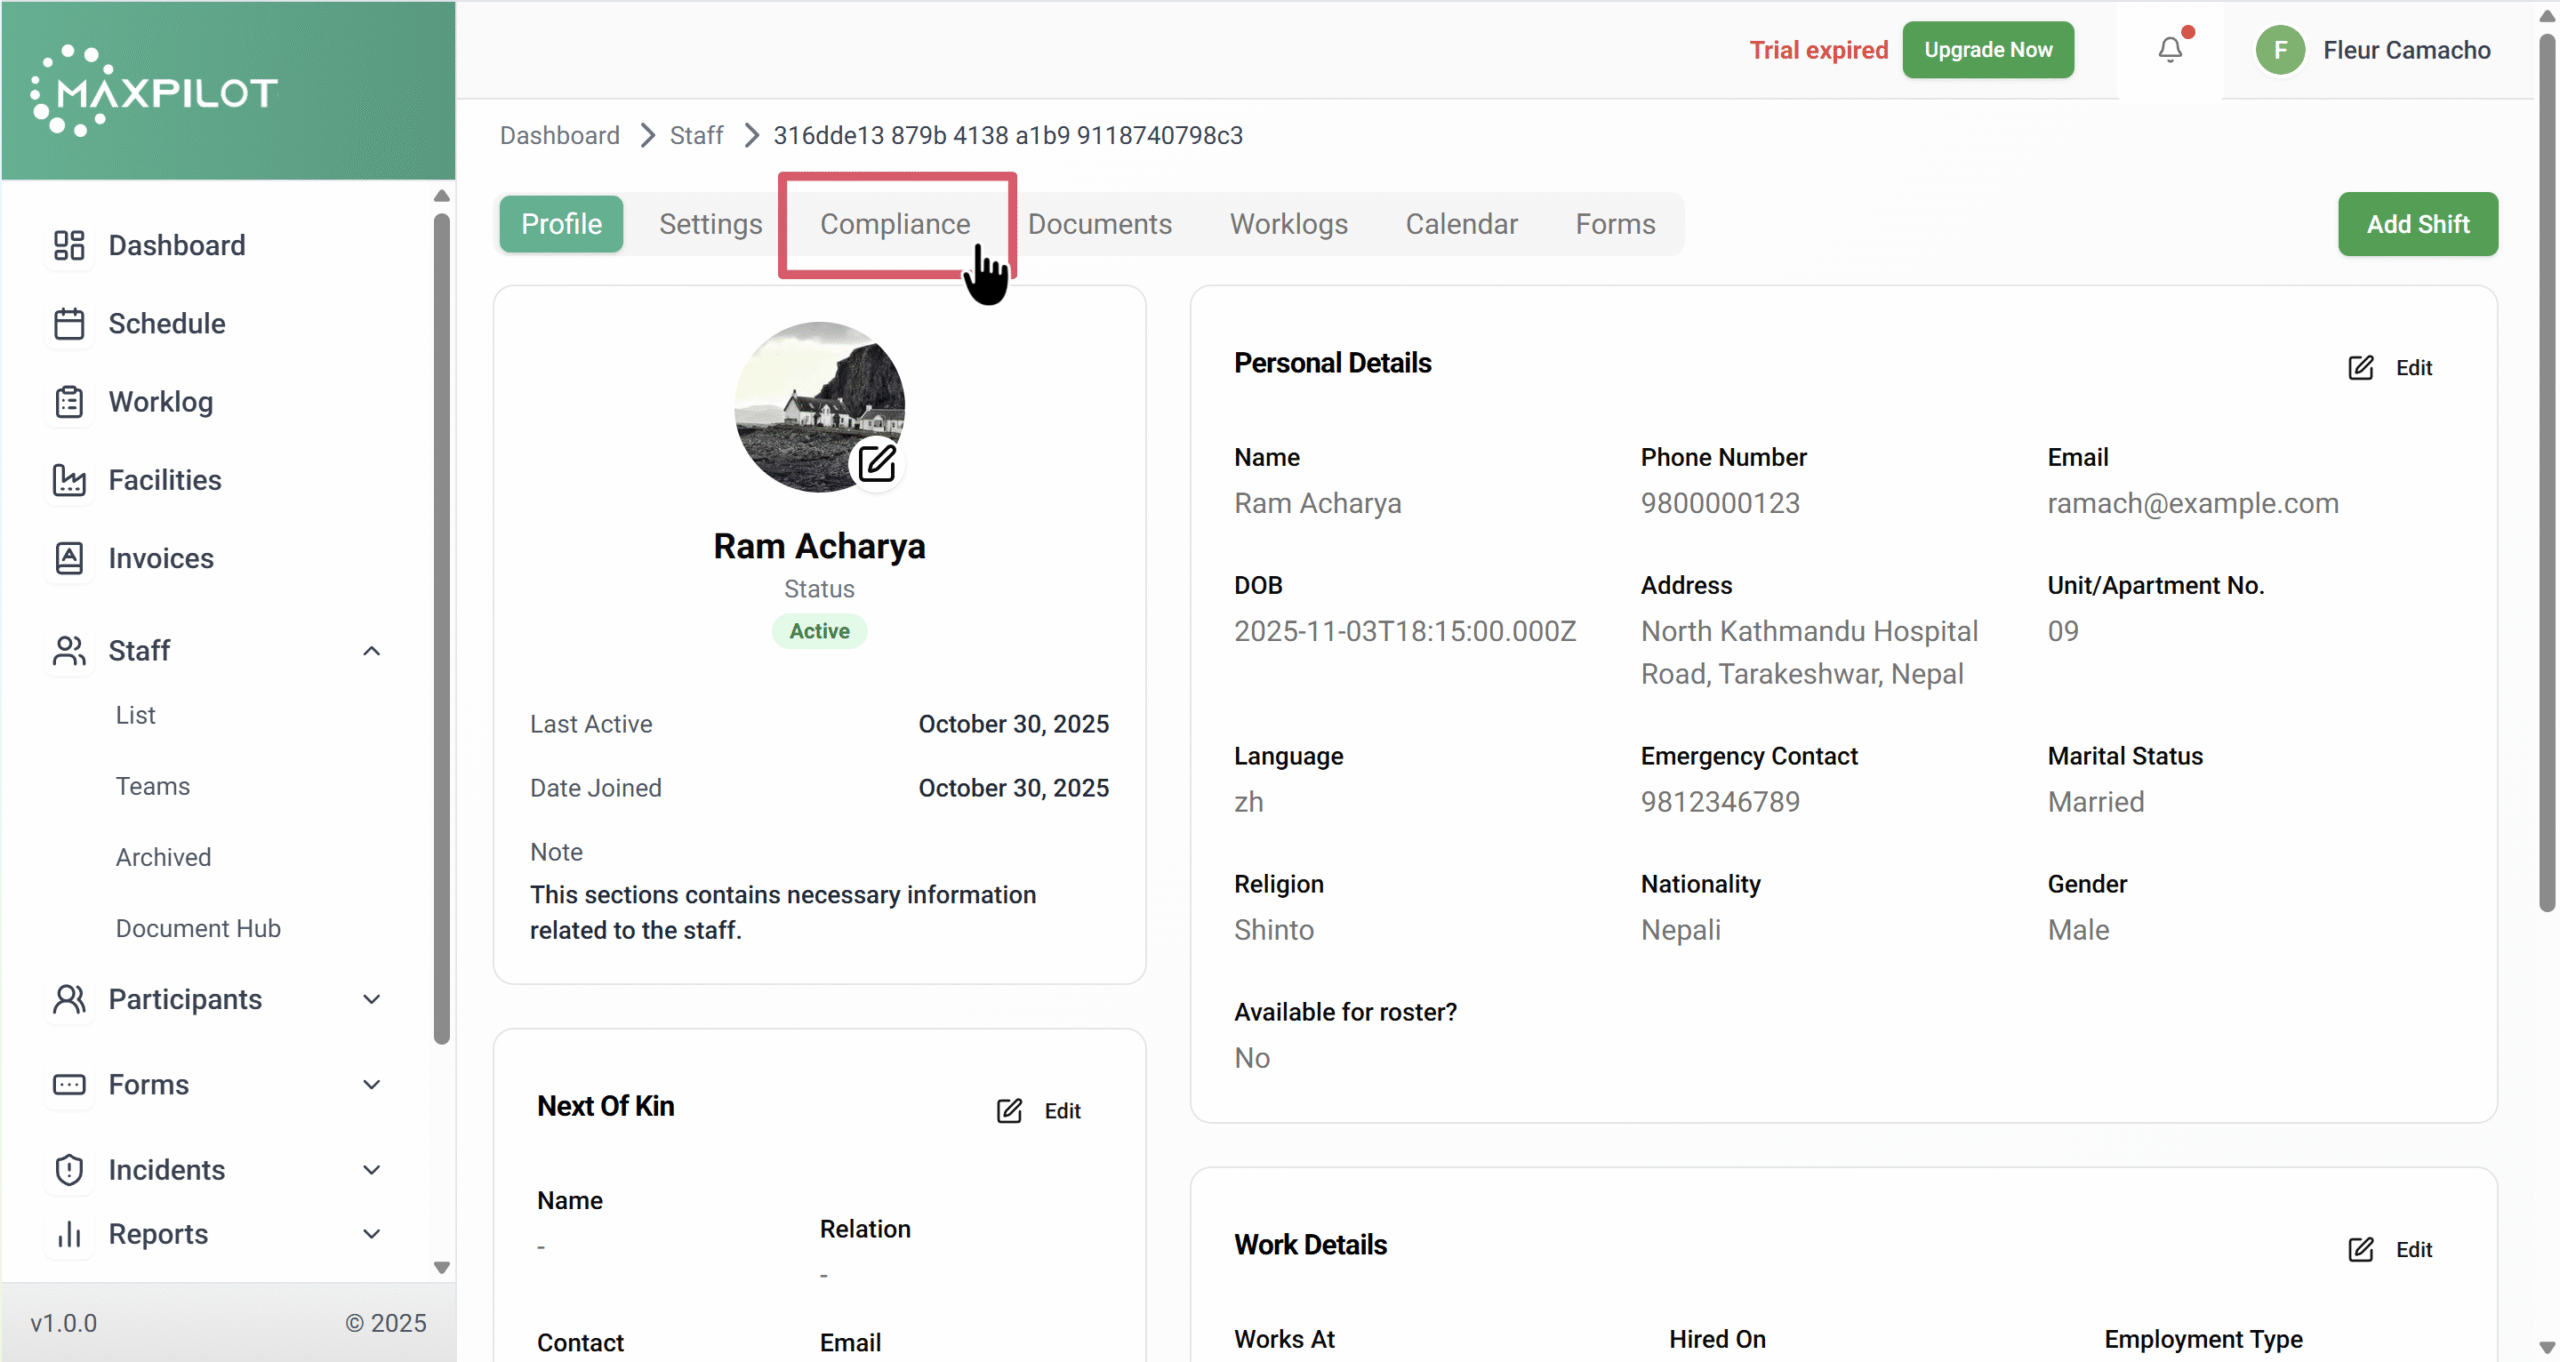
Once the staff profile opens, several tabs will appear — Profile, Settings, Compliance, Documents, Worklogs, Calendar, and Forms.
Click on the Compliance tab.
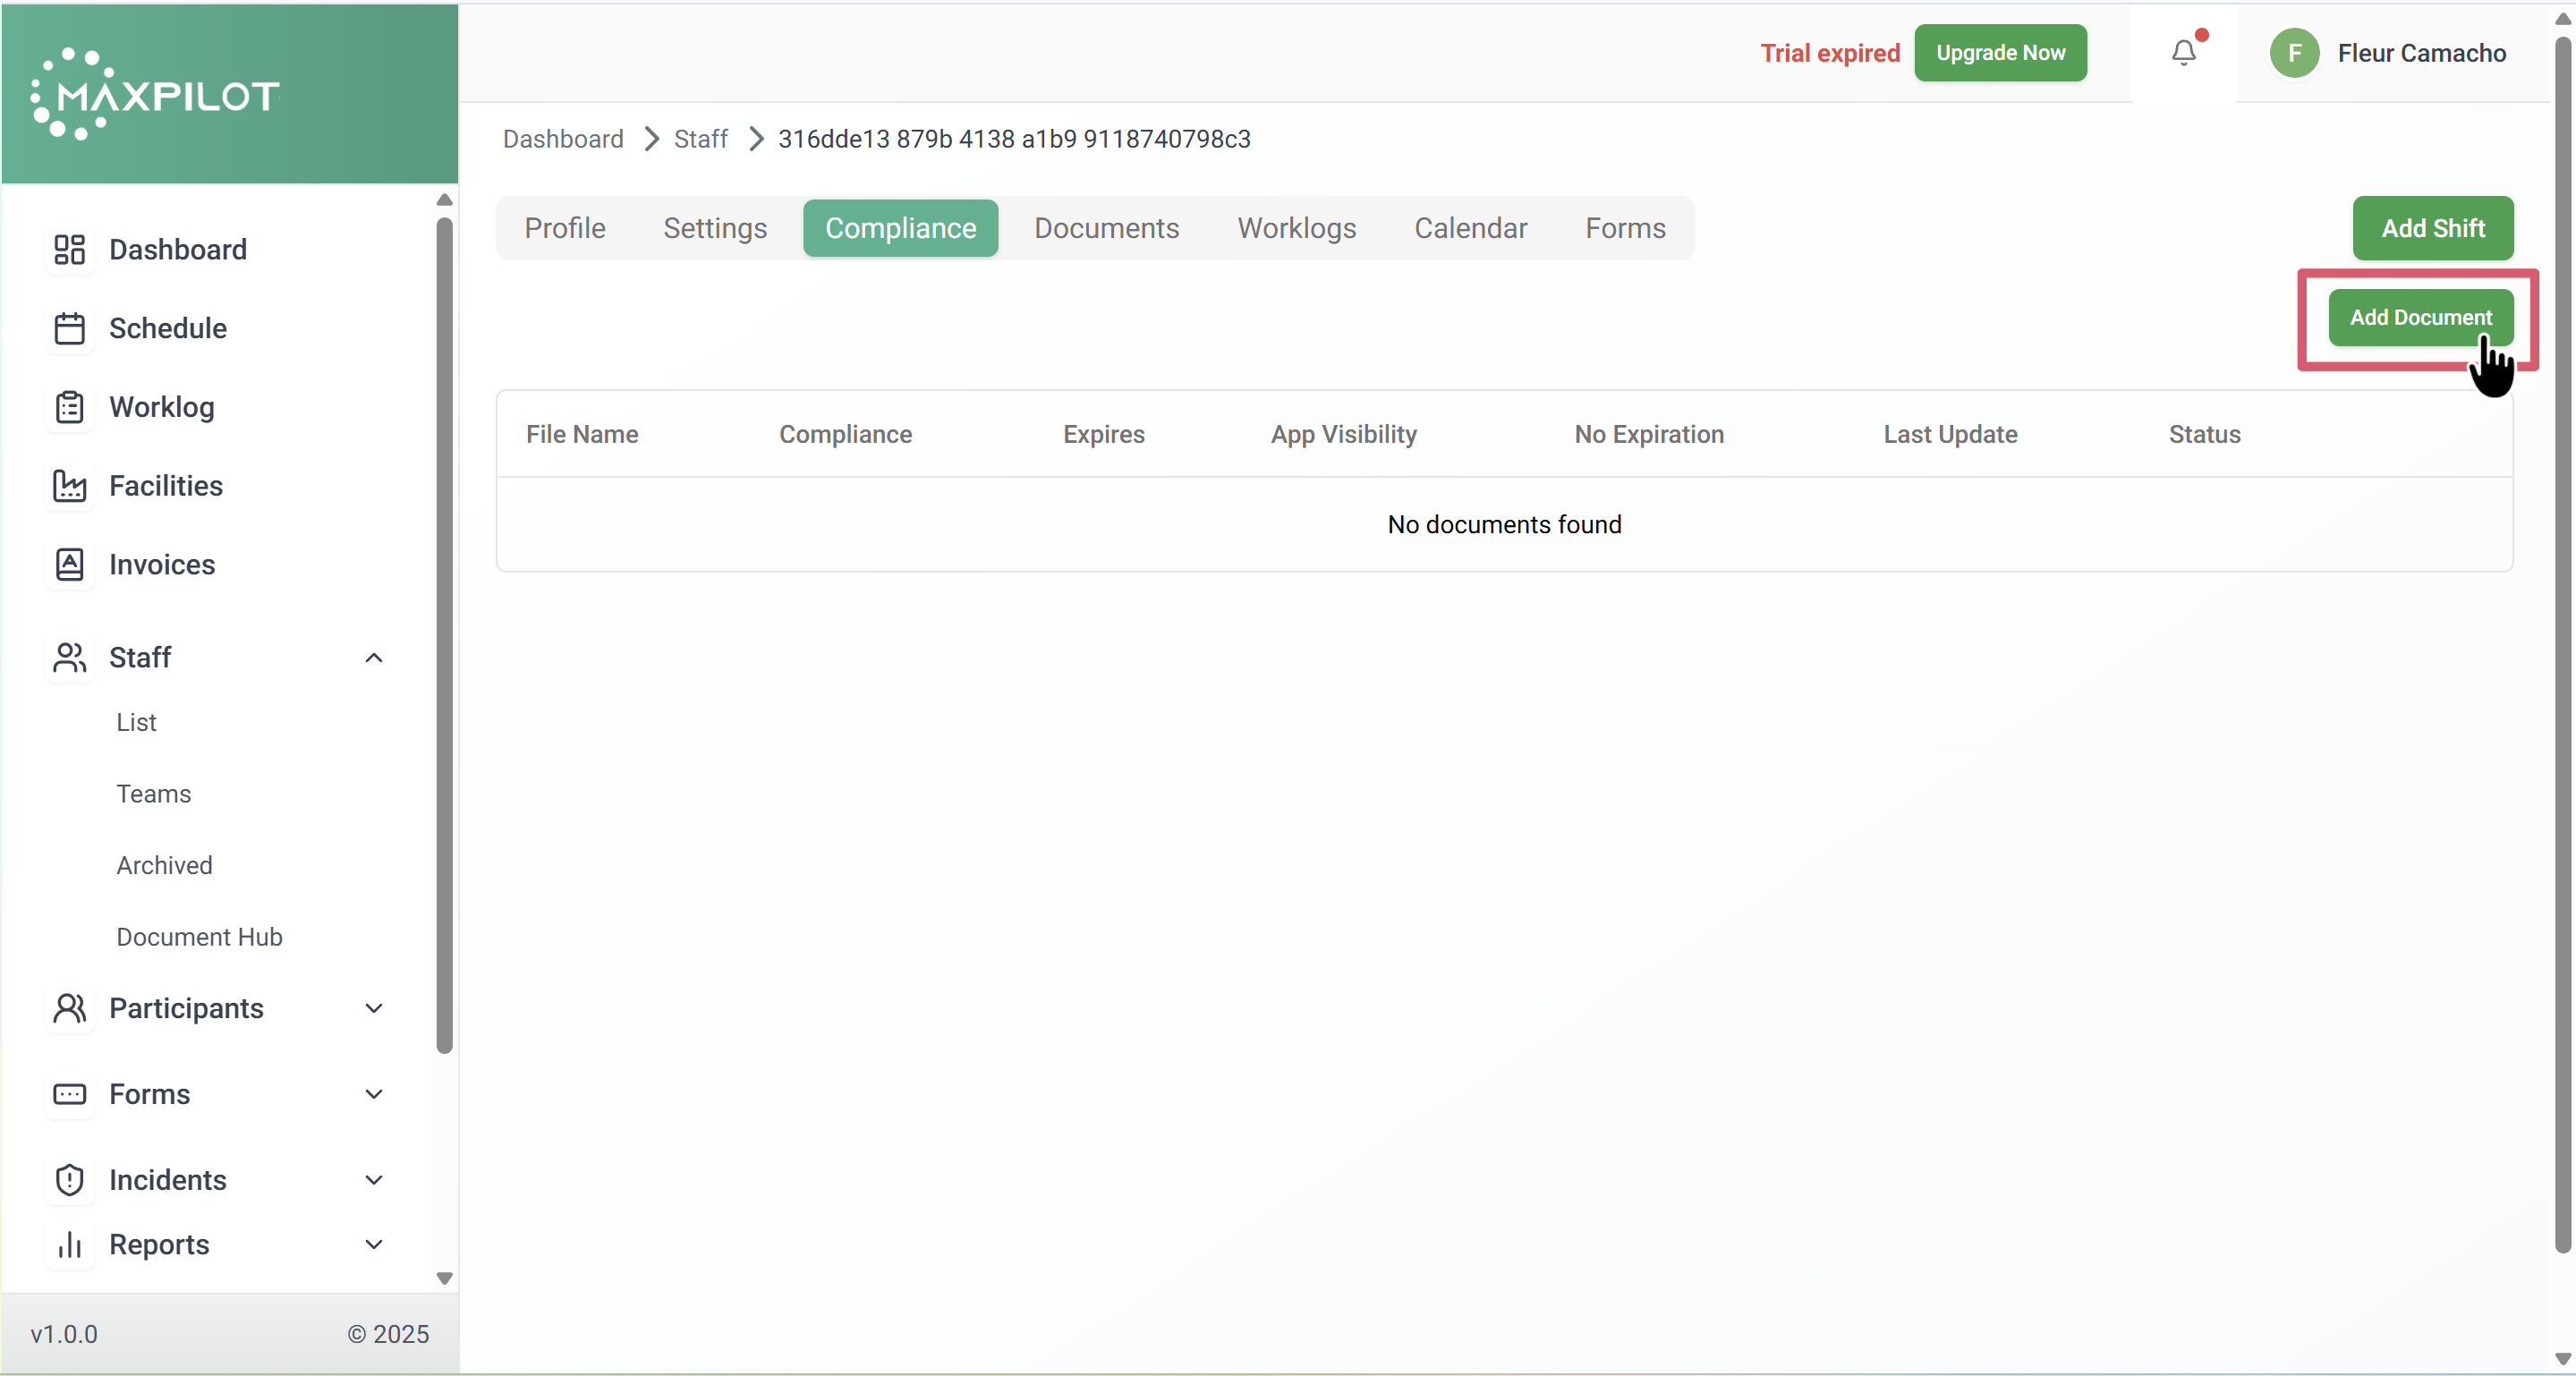
This section will show all uploaded compliance-related documents (if any). If there are no documents yet, the table will appear empty.
Step 3: Add a New Document
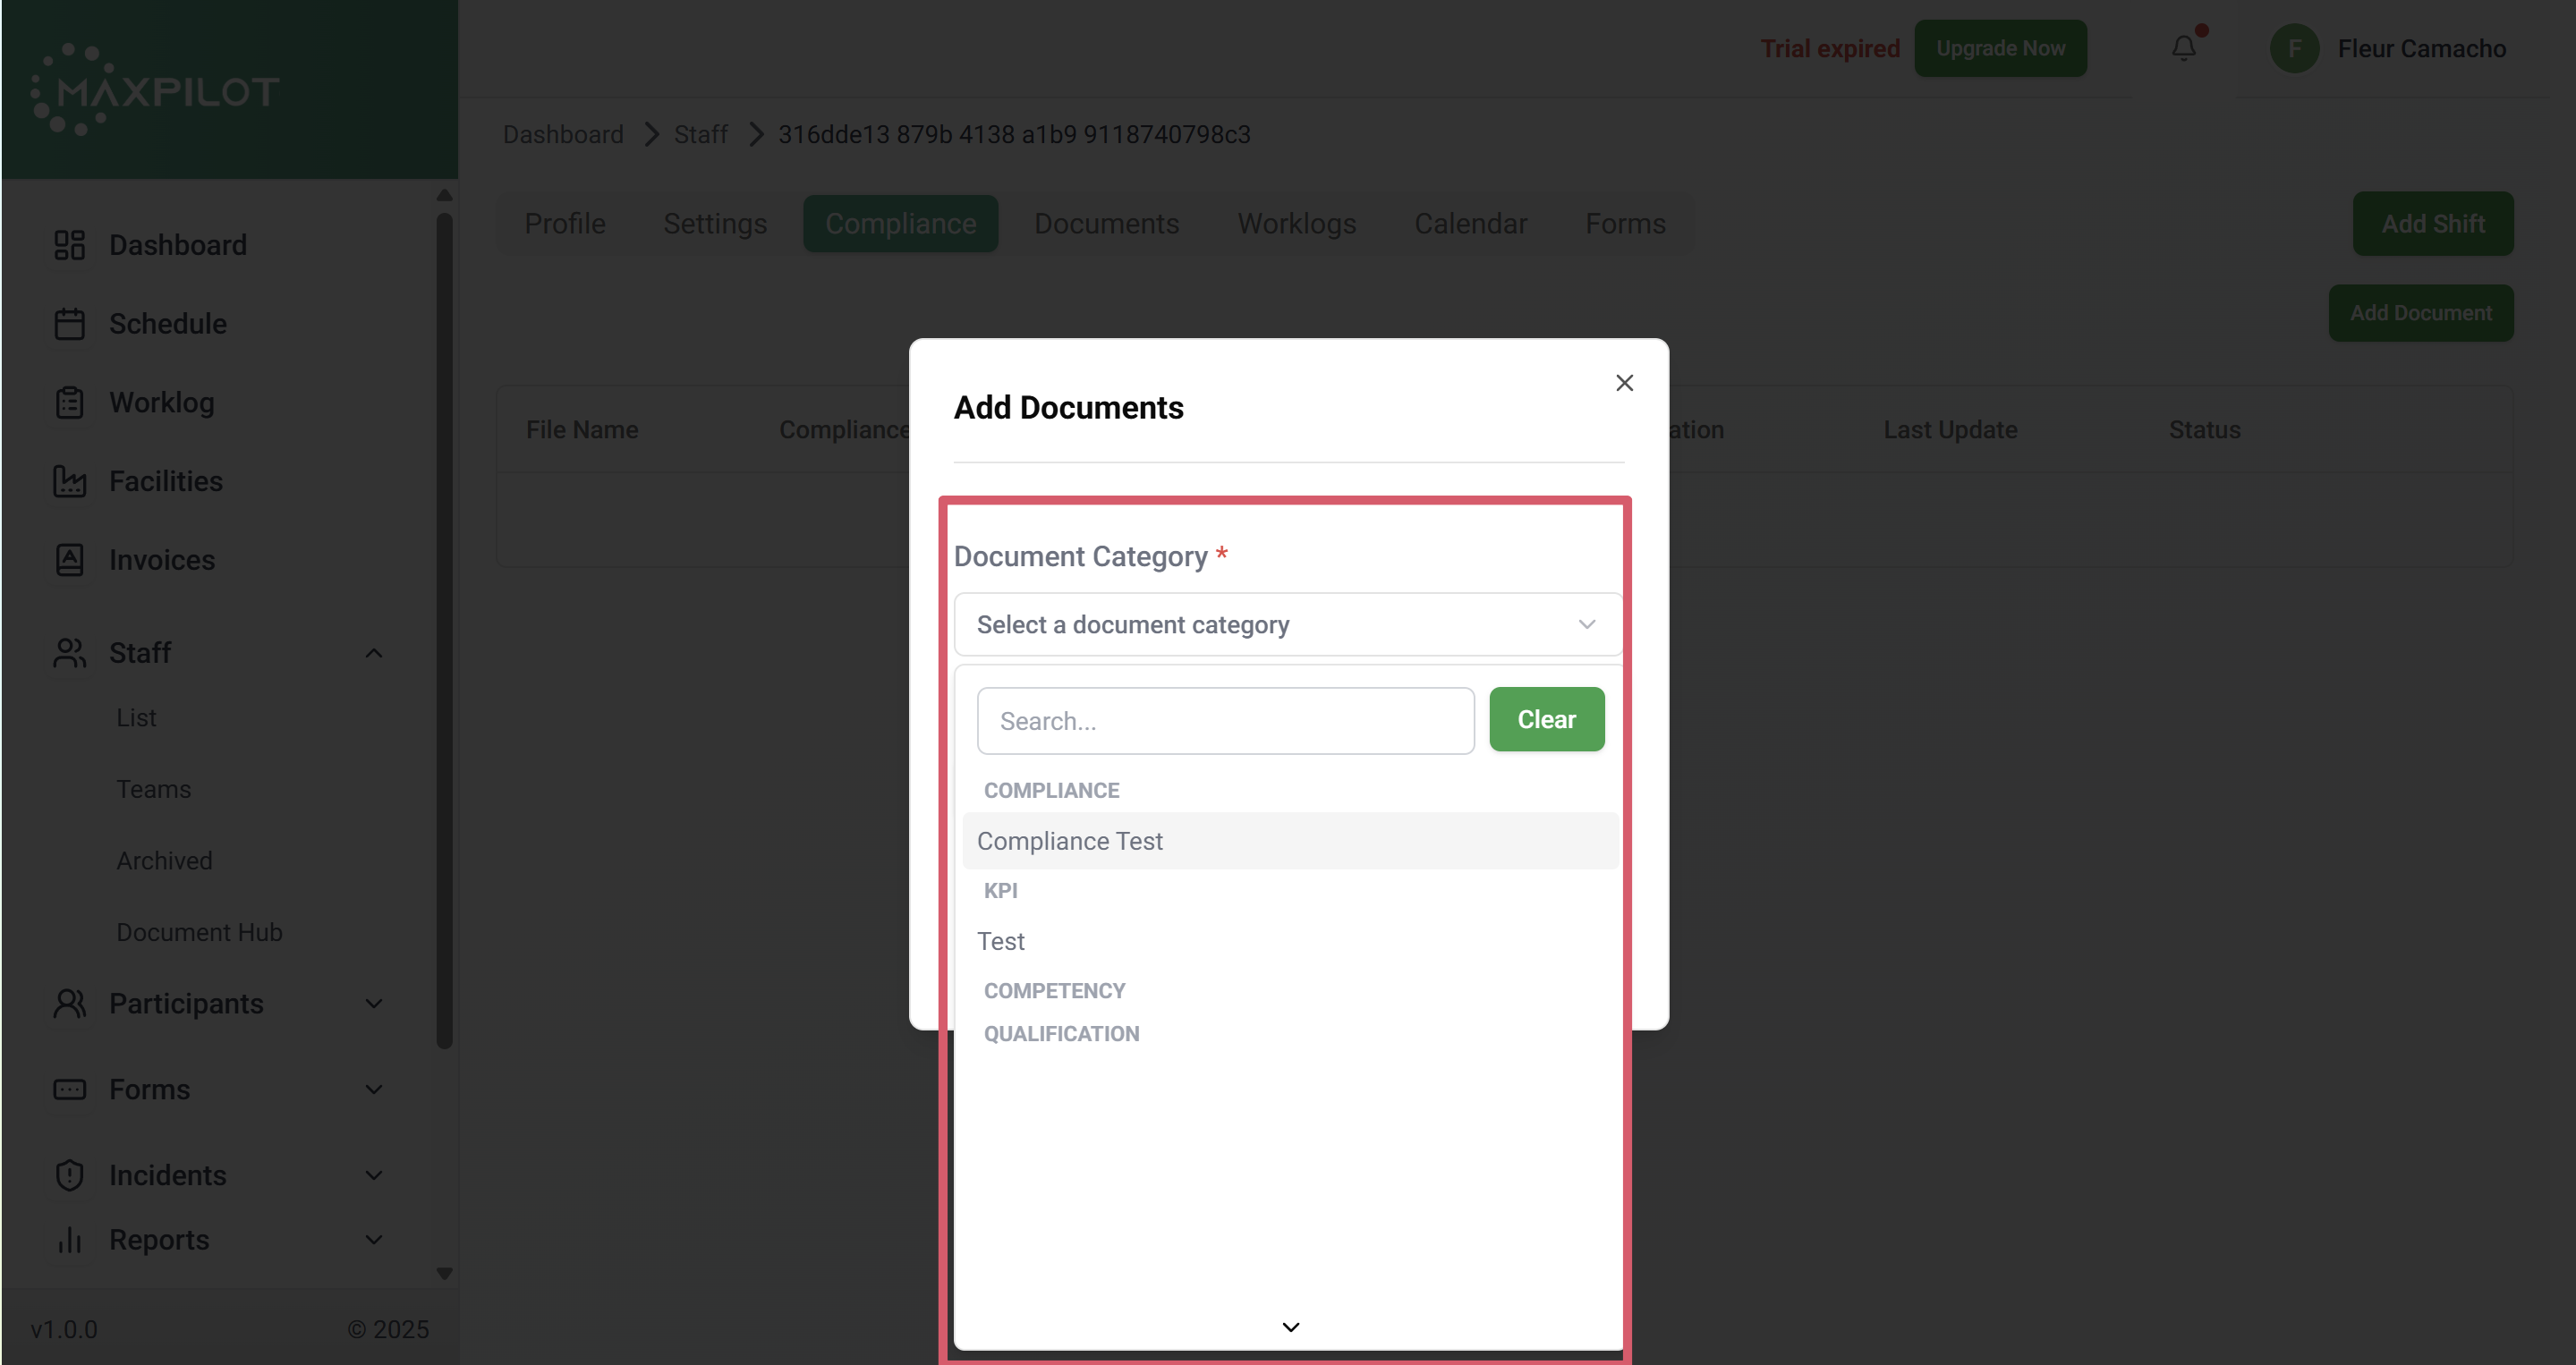
Click the Add Document button in the top-right corner of the Compliance page.
A pop-up window titled Add Documents will appear.
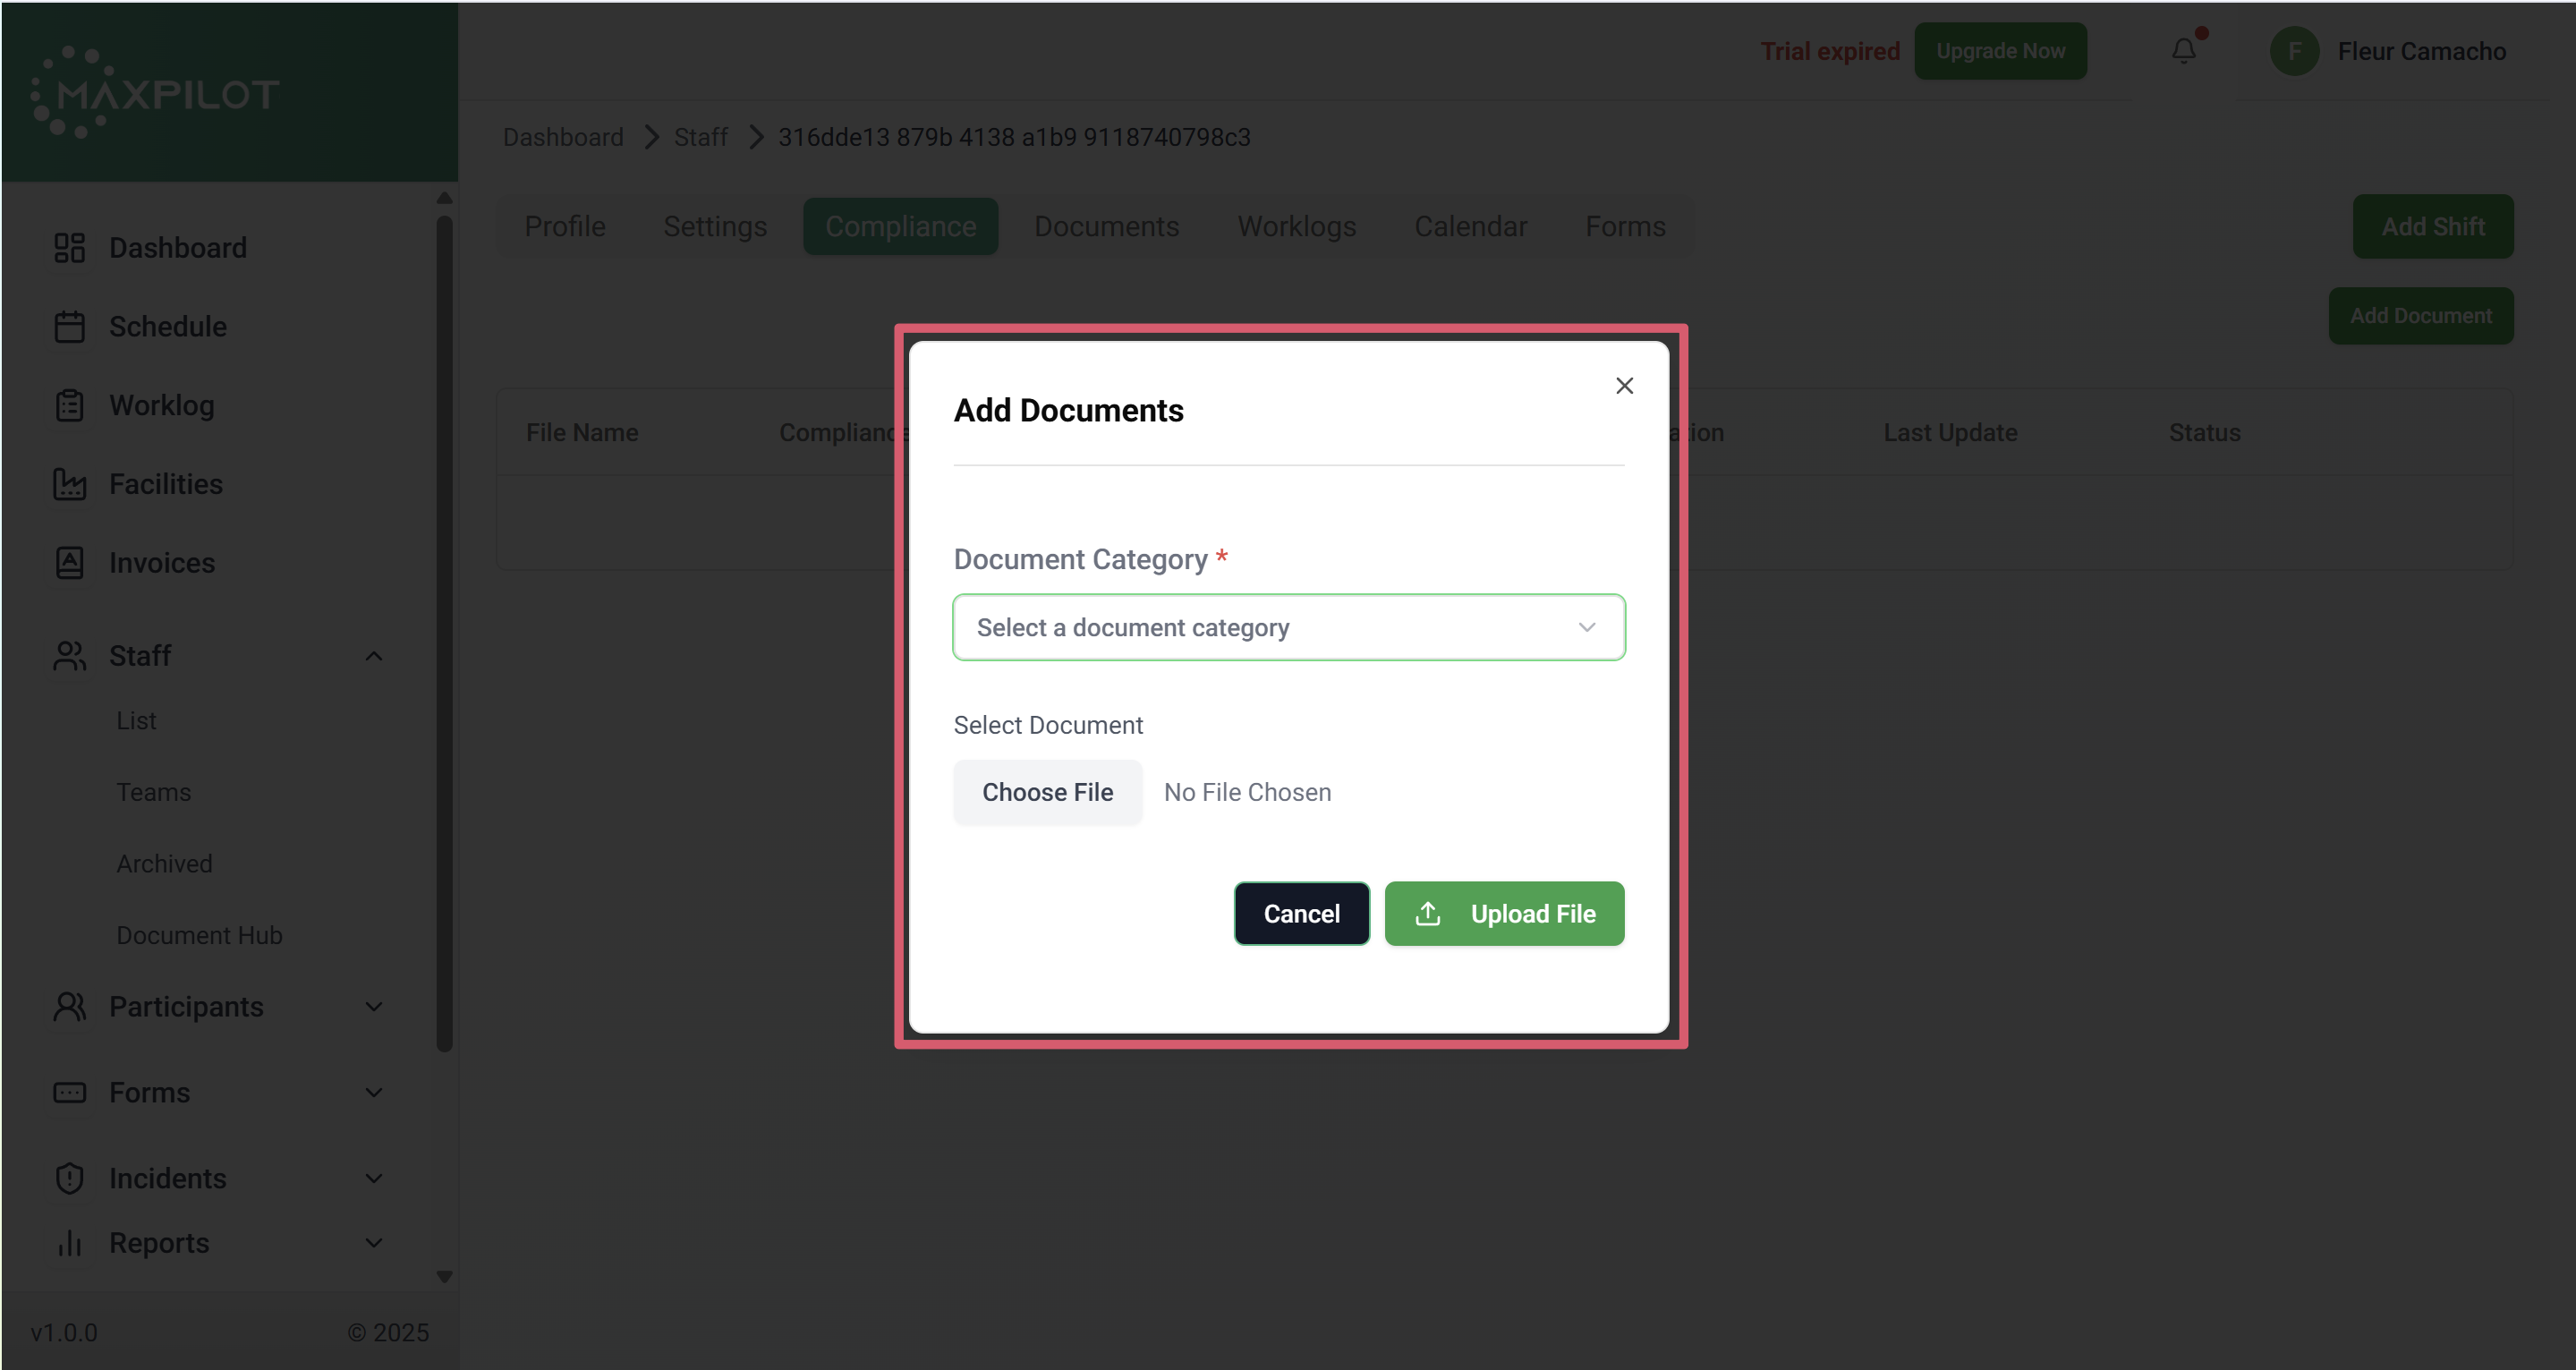
Step 4: Fill in the “Add Documents” Form
The Add Documents form contains two key input fields:
- Document Category – Select a relevant category from the dropdown list.
- Categories may include:
- Compliance Test
- Qualification
- Competency
- KPI
- Training Certificate
- The selected category determines how the file is grouped and displayed in the Compliance table.
- For example, if you choose Compliance Test, the document will appear under the “Compliance Test” category for that staff.
- Categories may include:
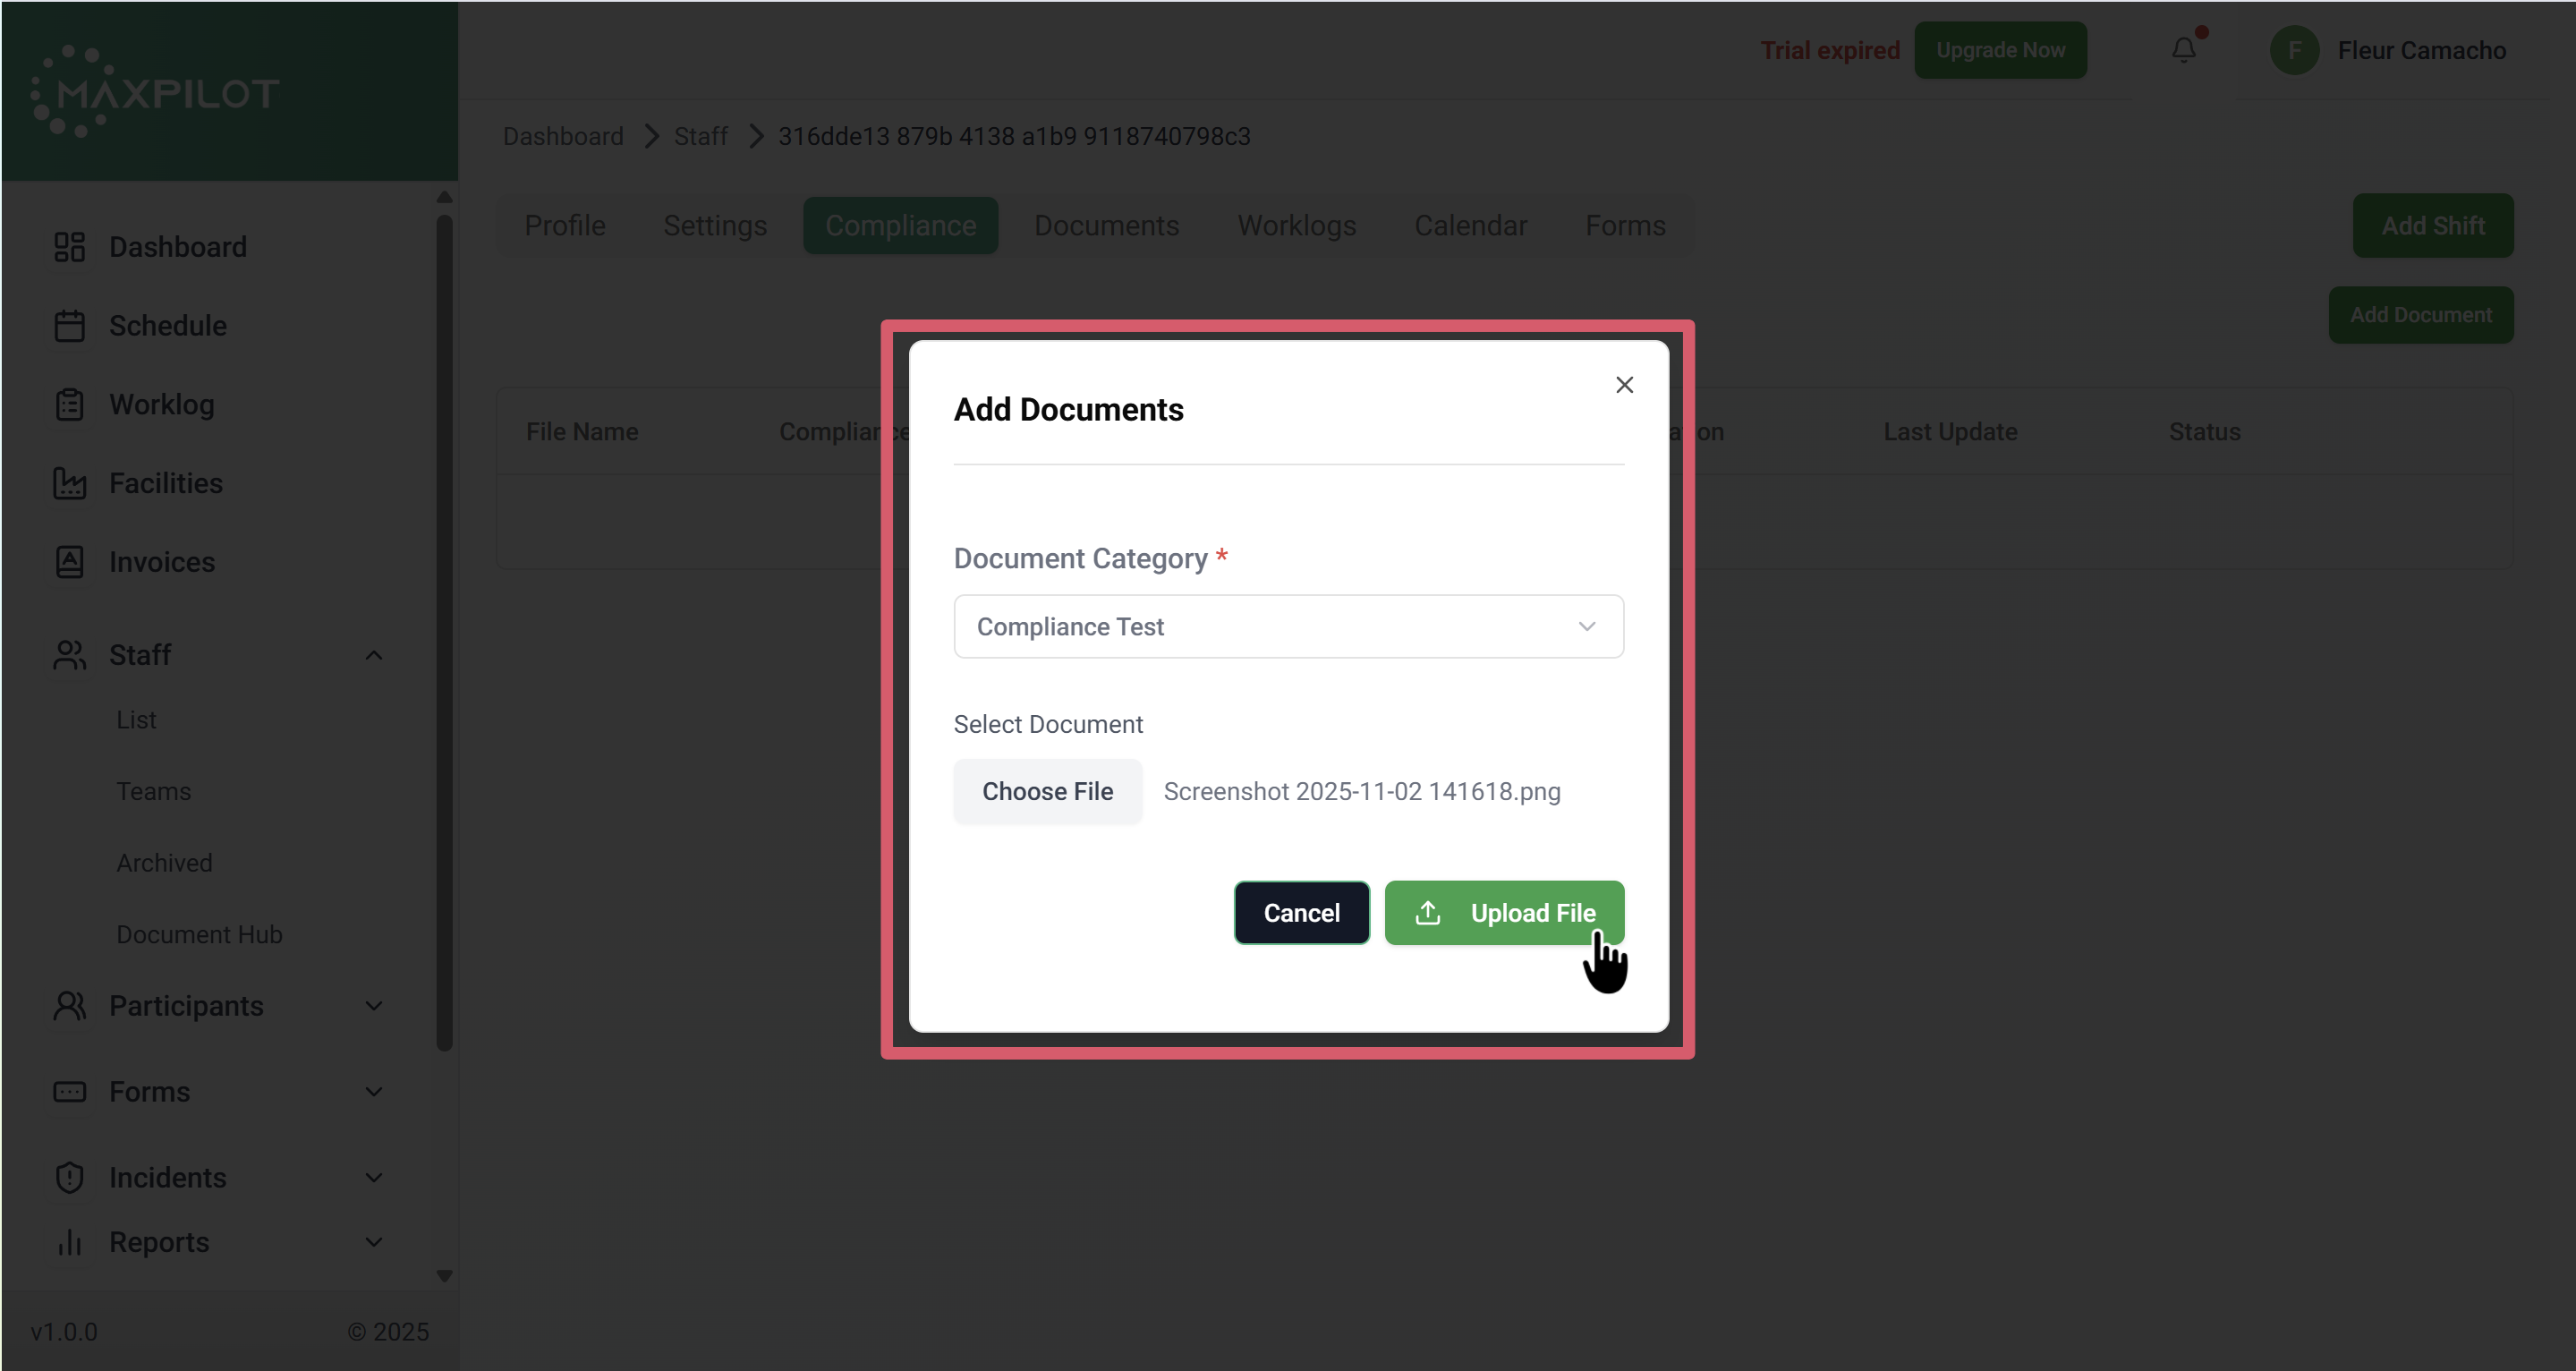
- Select Document – Click Choose File to browse and upload the file from your device.
- Supported file types typically include PDFs, images, or documents.
- Make sure the file name is clear and descriptive (e.g., “Safety_Training_2025.pdf”).
After both fields are filled, click the Upload File button to save the document.
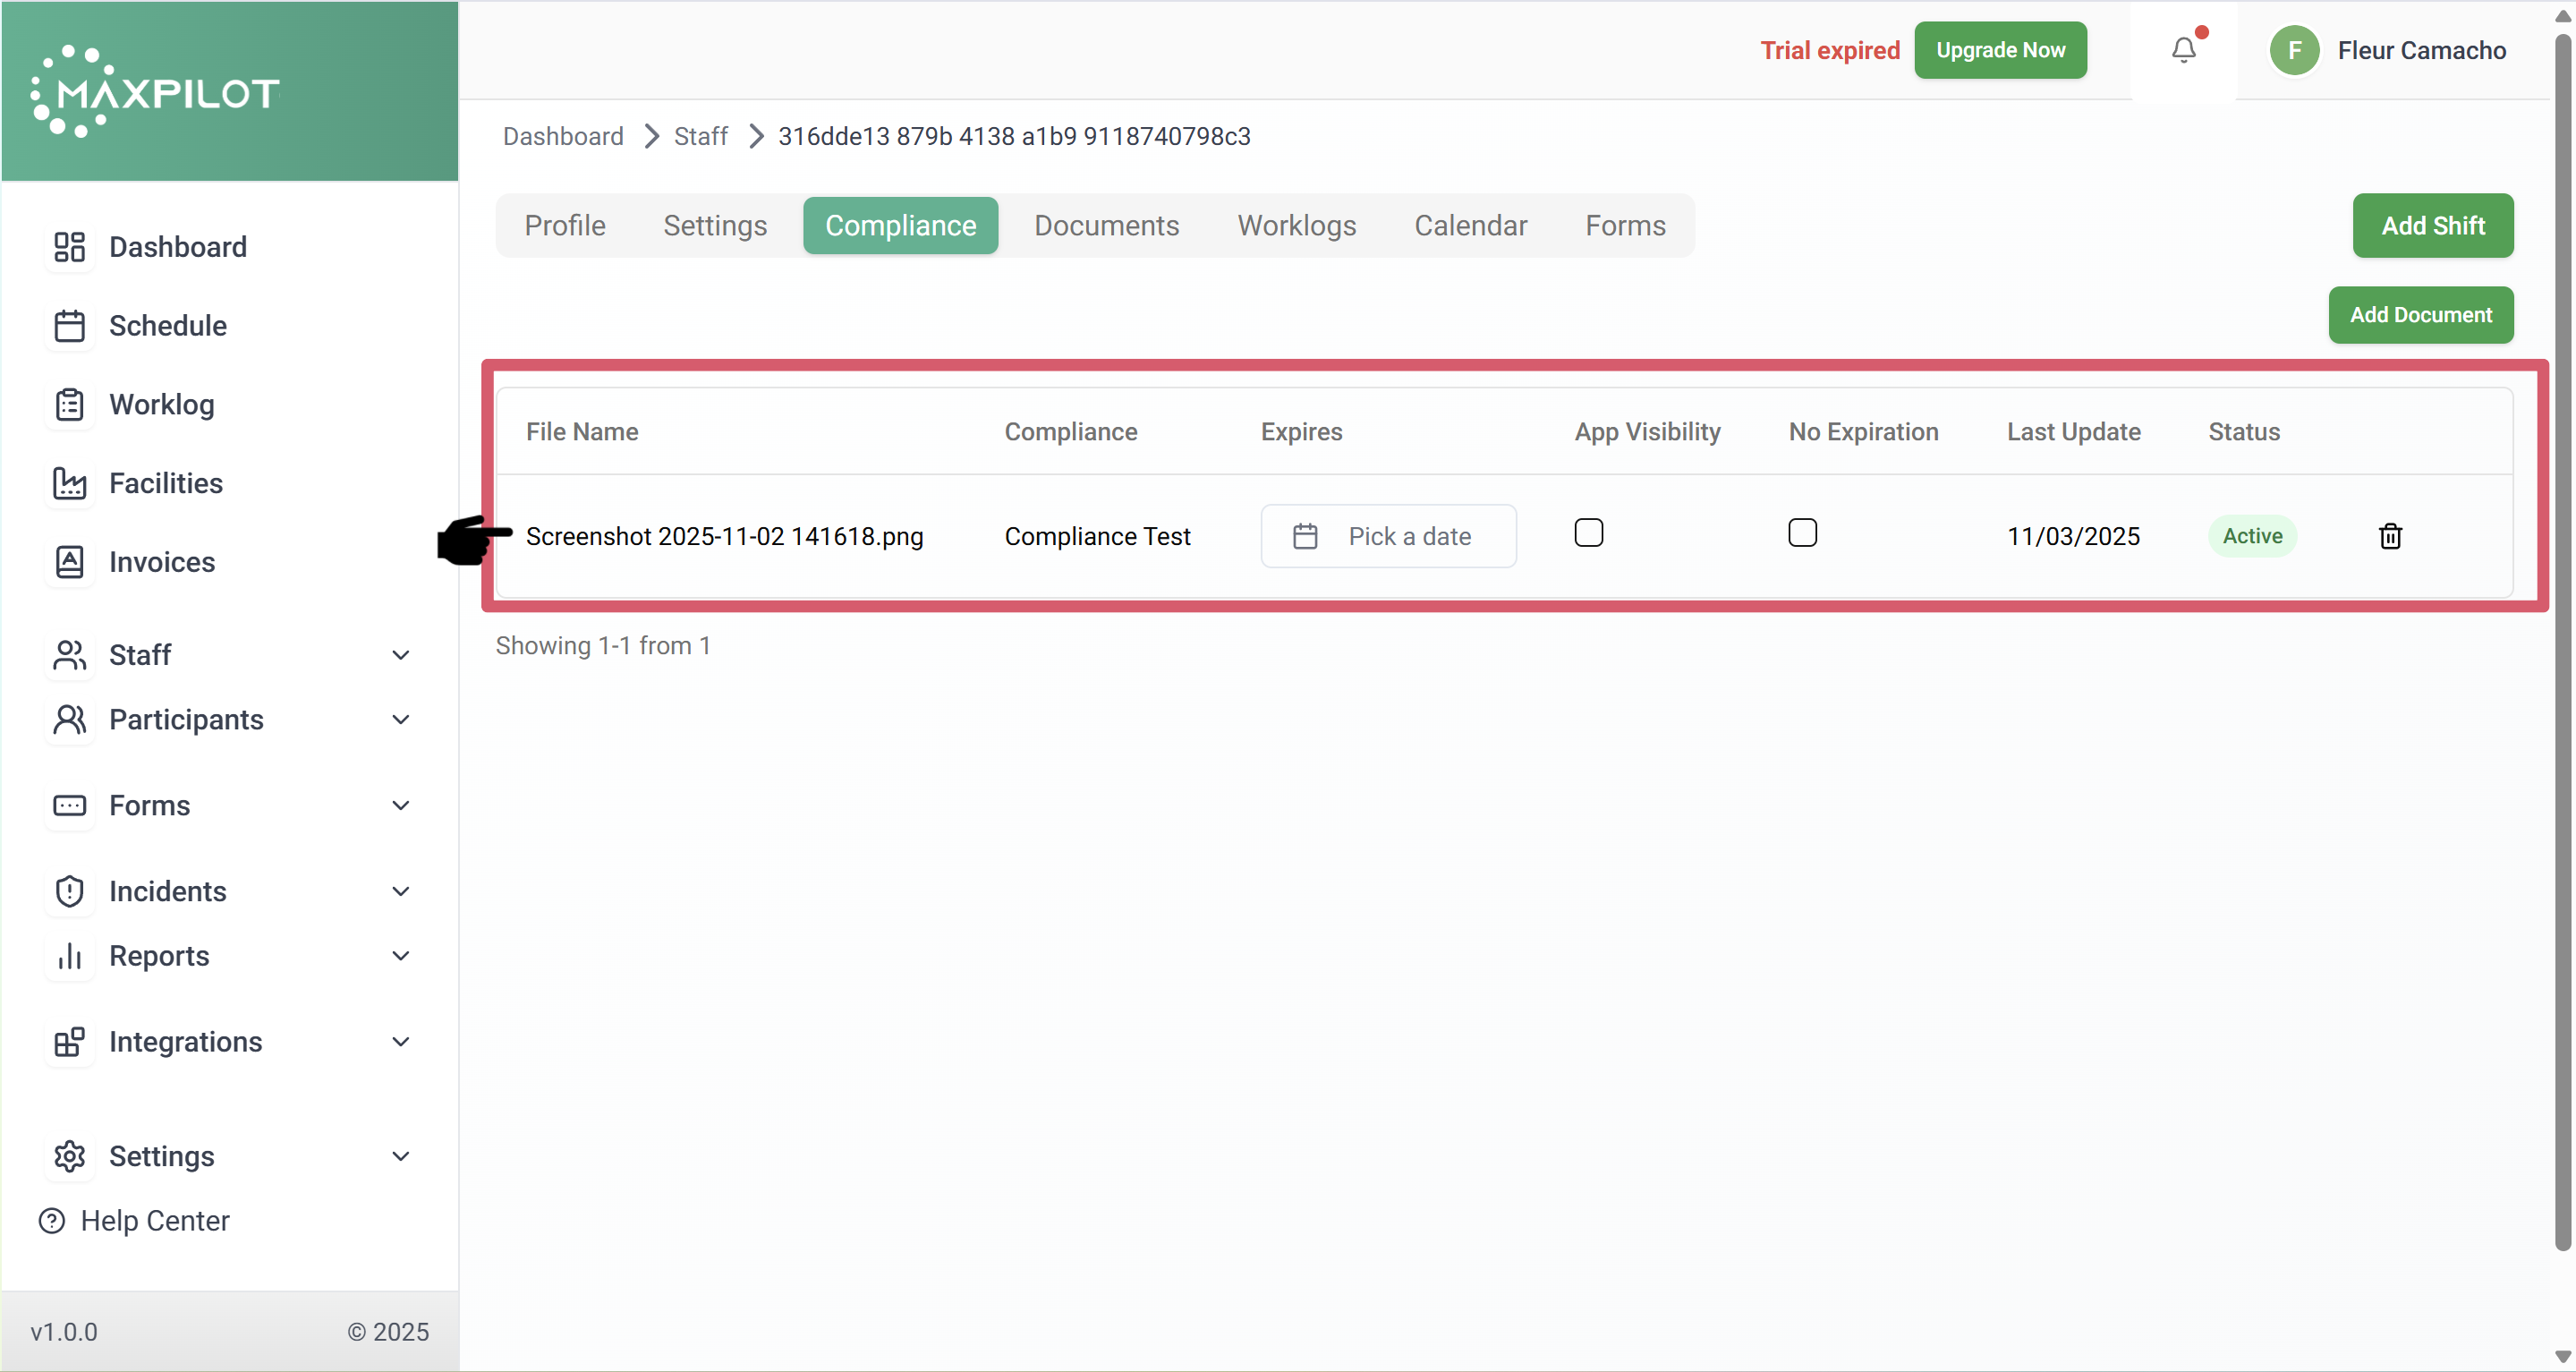
Step 5: Verify Uploaded Document
Once uploaded, the file will appear in the Compliance table with details including:
If the document has an expiry date (for instance, a certification that requires renewal), you can set it directly from this table.
Additional Notes:
After successfully uploading the file in the Compliance tab, it will automatically appear in the Documents tab for that same staff profile.
This eliminates the need to re-upload the same file.
