How to Add a Participant?
Participants are clients who receive services through the system. Adding them correctly helps ensure that shifts, funds, and schedules are linked accurately. Follow the steps below to add a new participant and manage their information effectively.
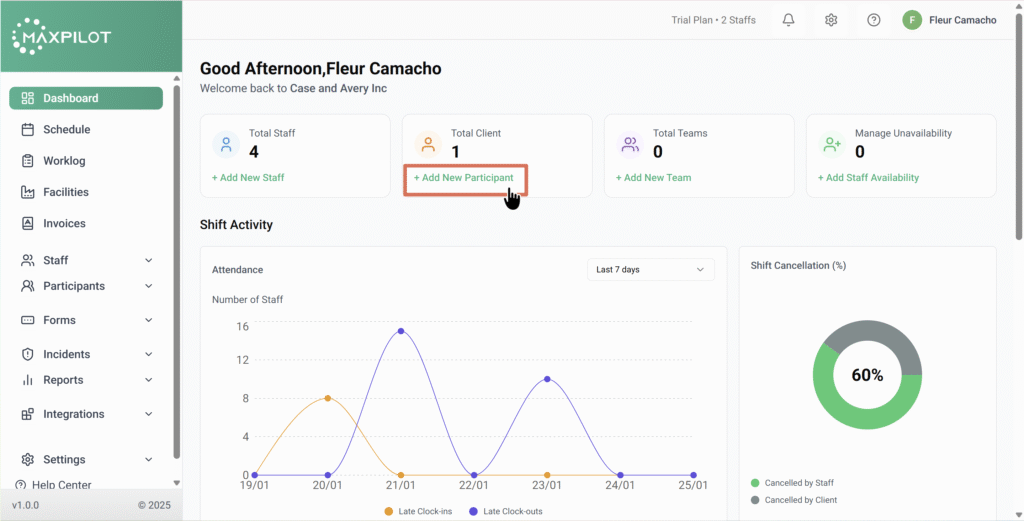
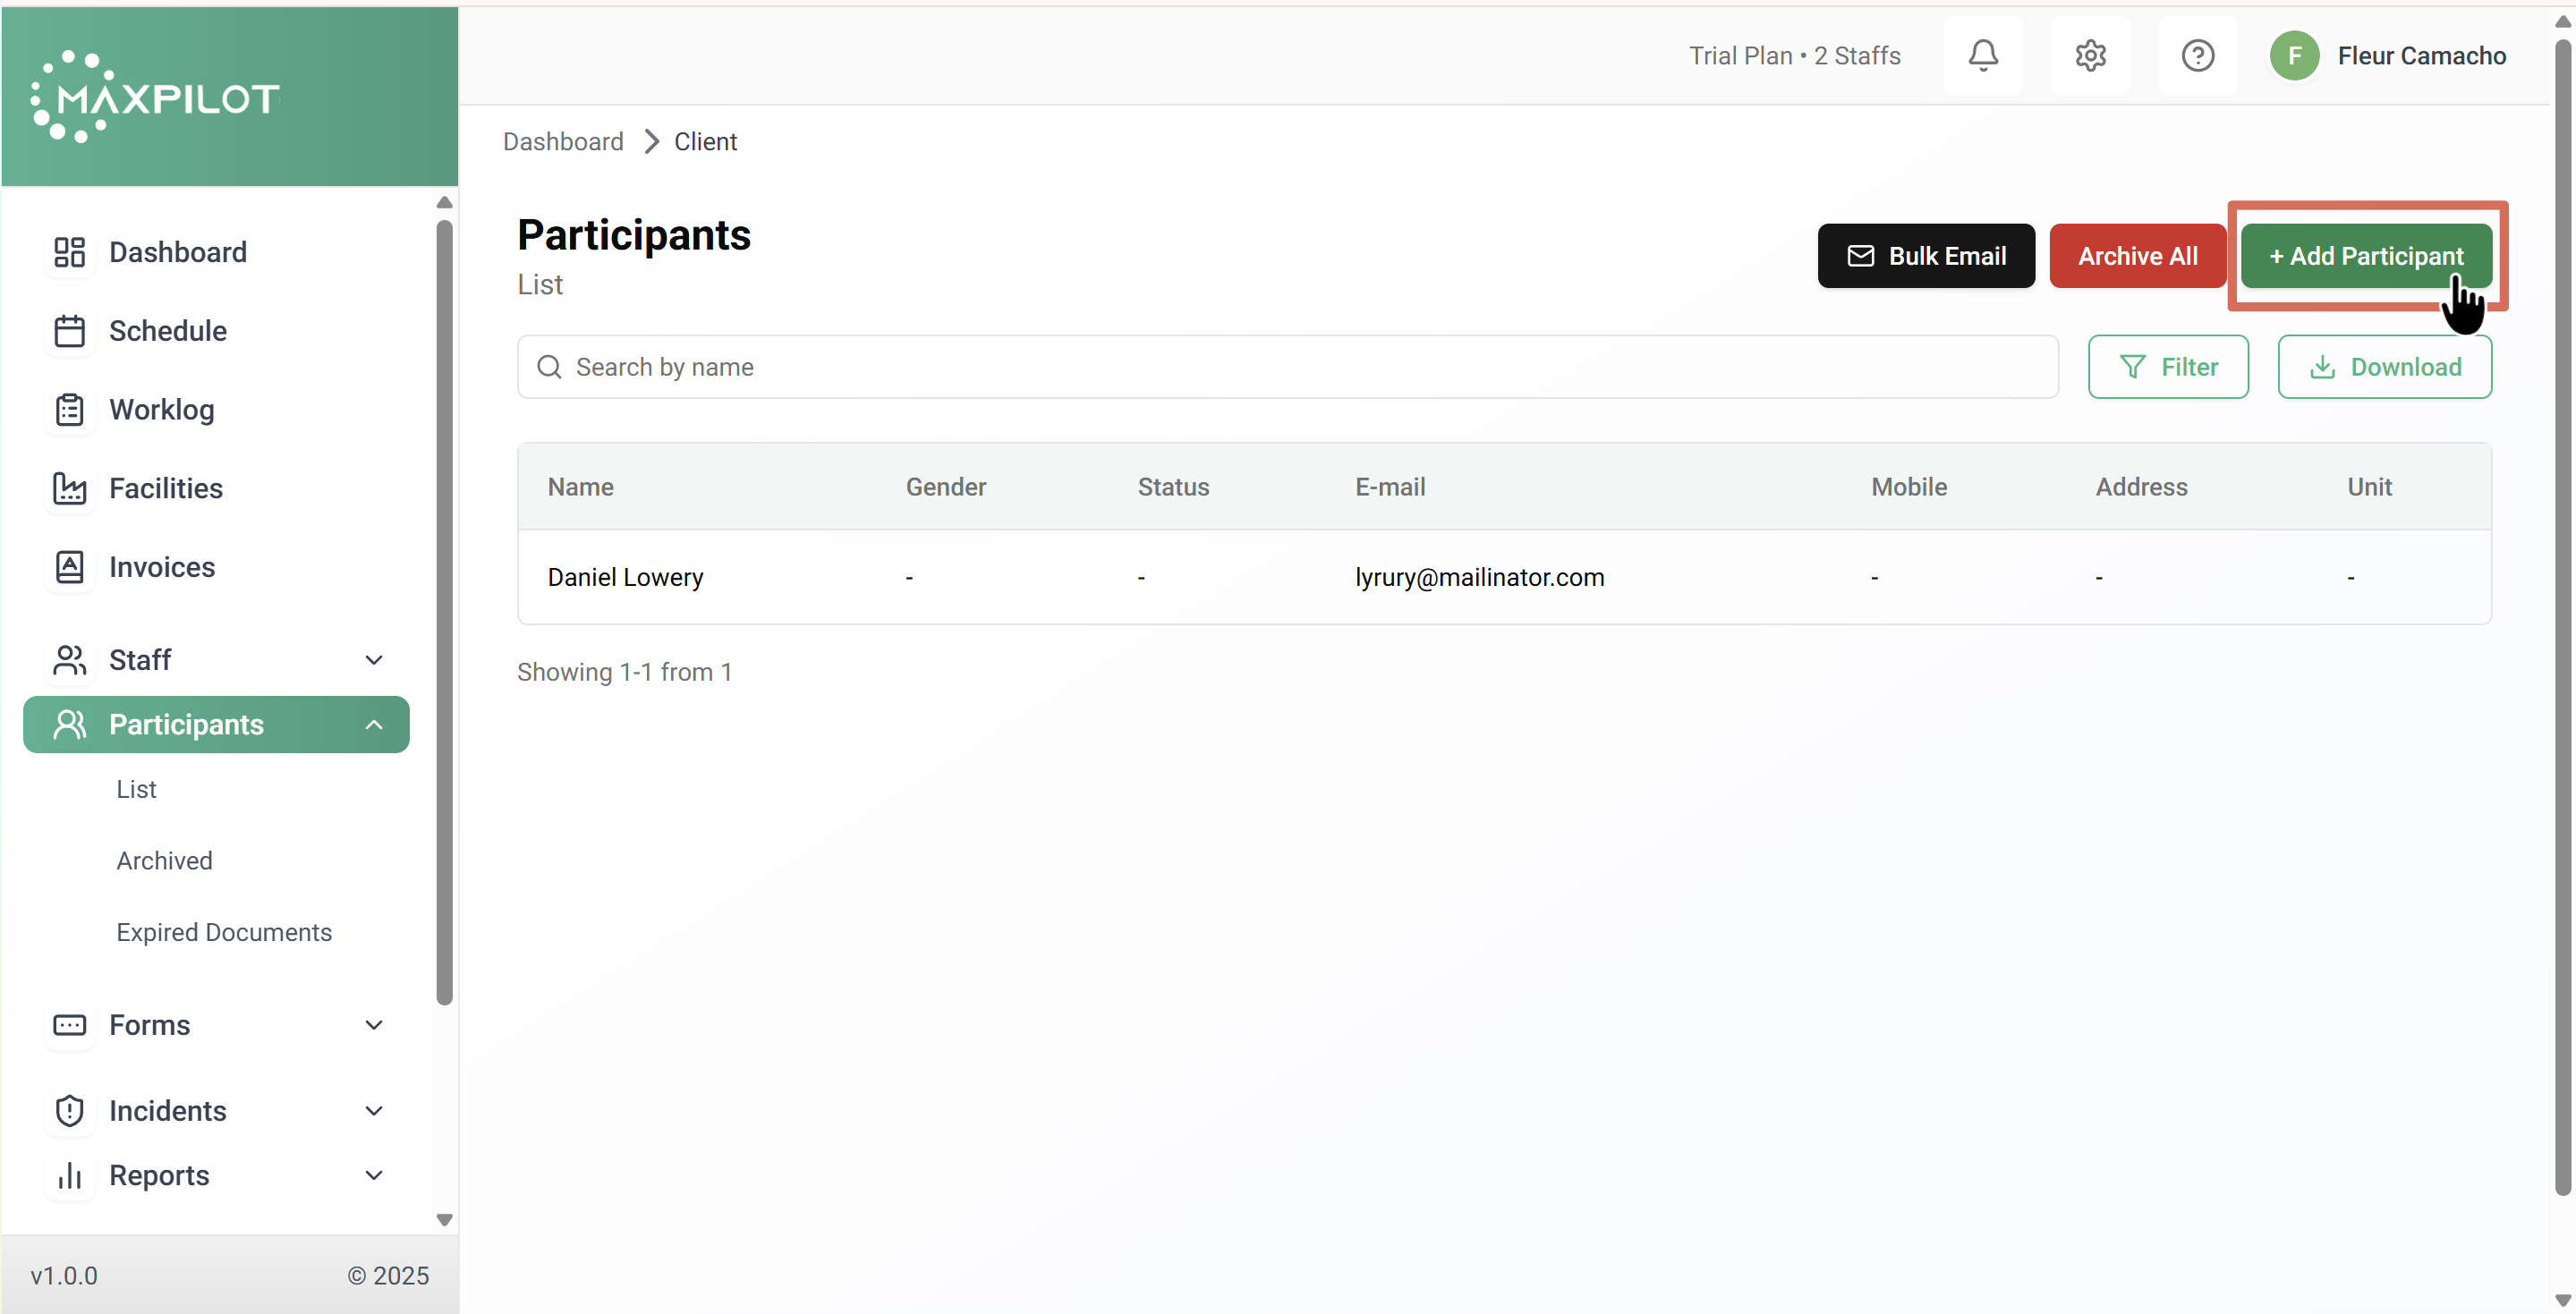
Step 1: Access the Add Participant Option
You can add a participant in two ways:
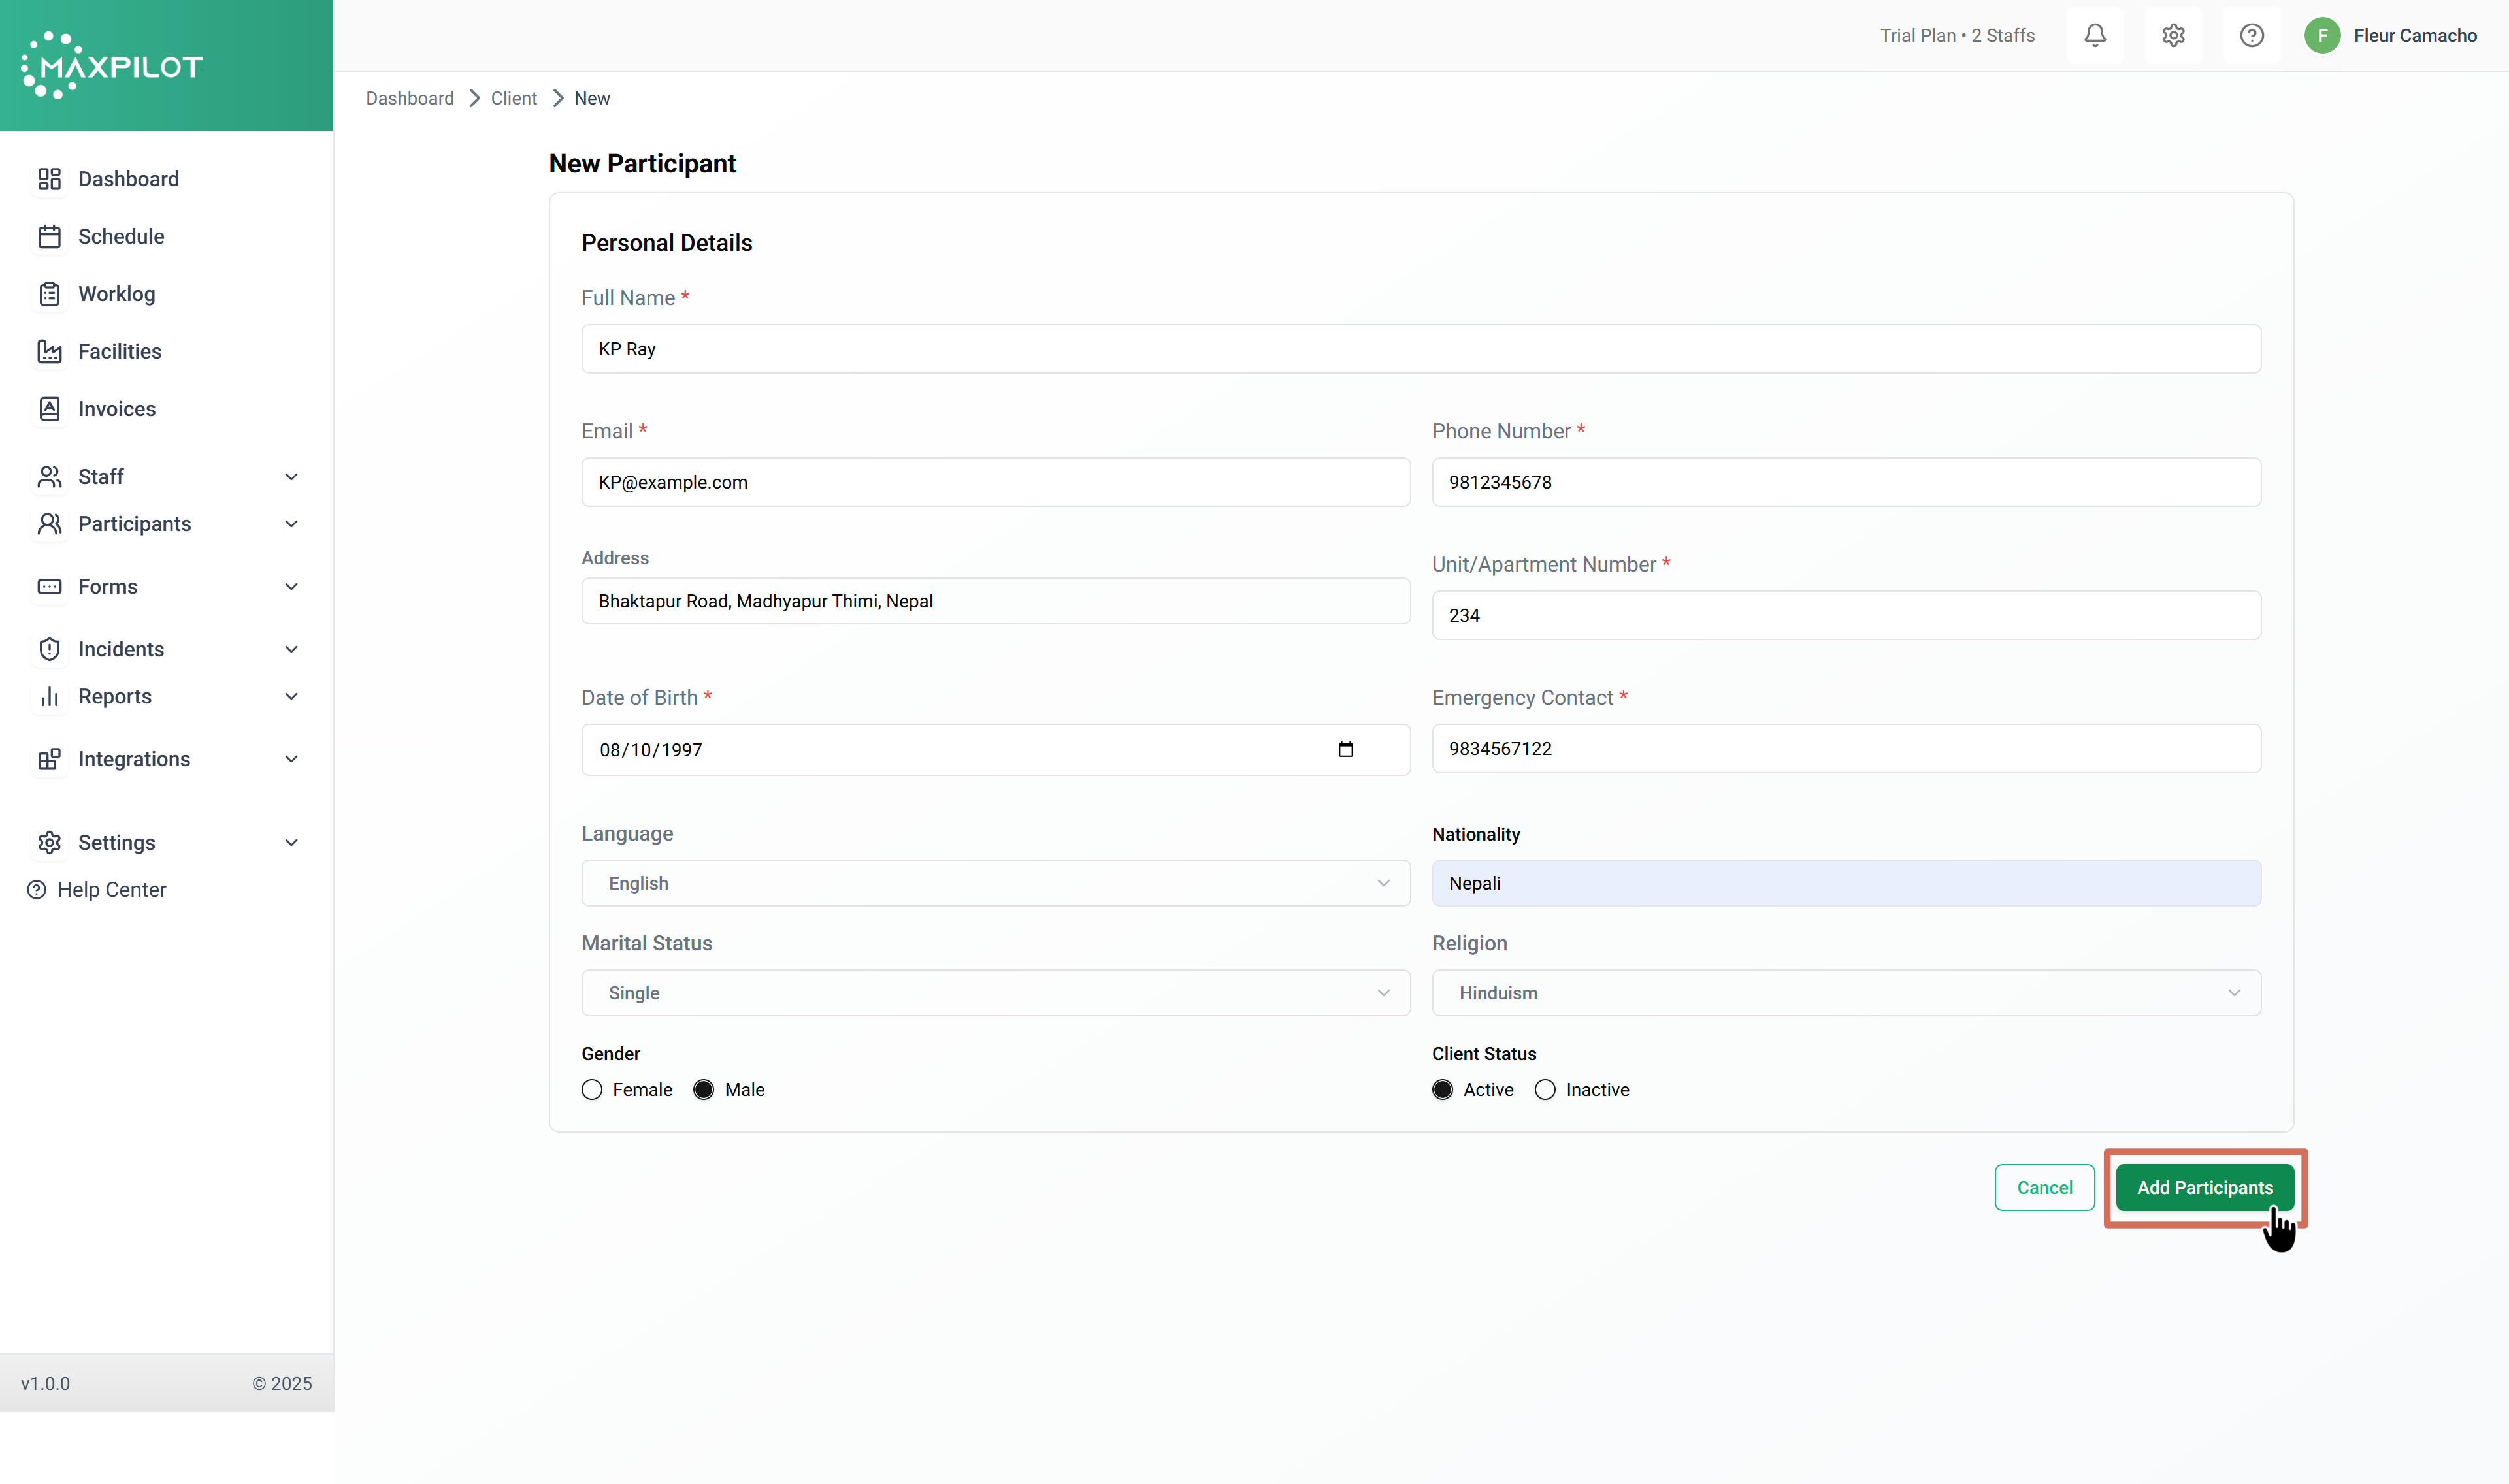
Step 2: Fill Out the Participant Details
Once you click + Add Participant, a form will open where you can enter the participant’s information.
Key fields include:
These fields help ensure all essential information about the participant is accurately stored in the system.
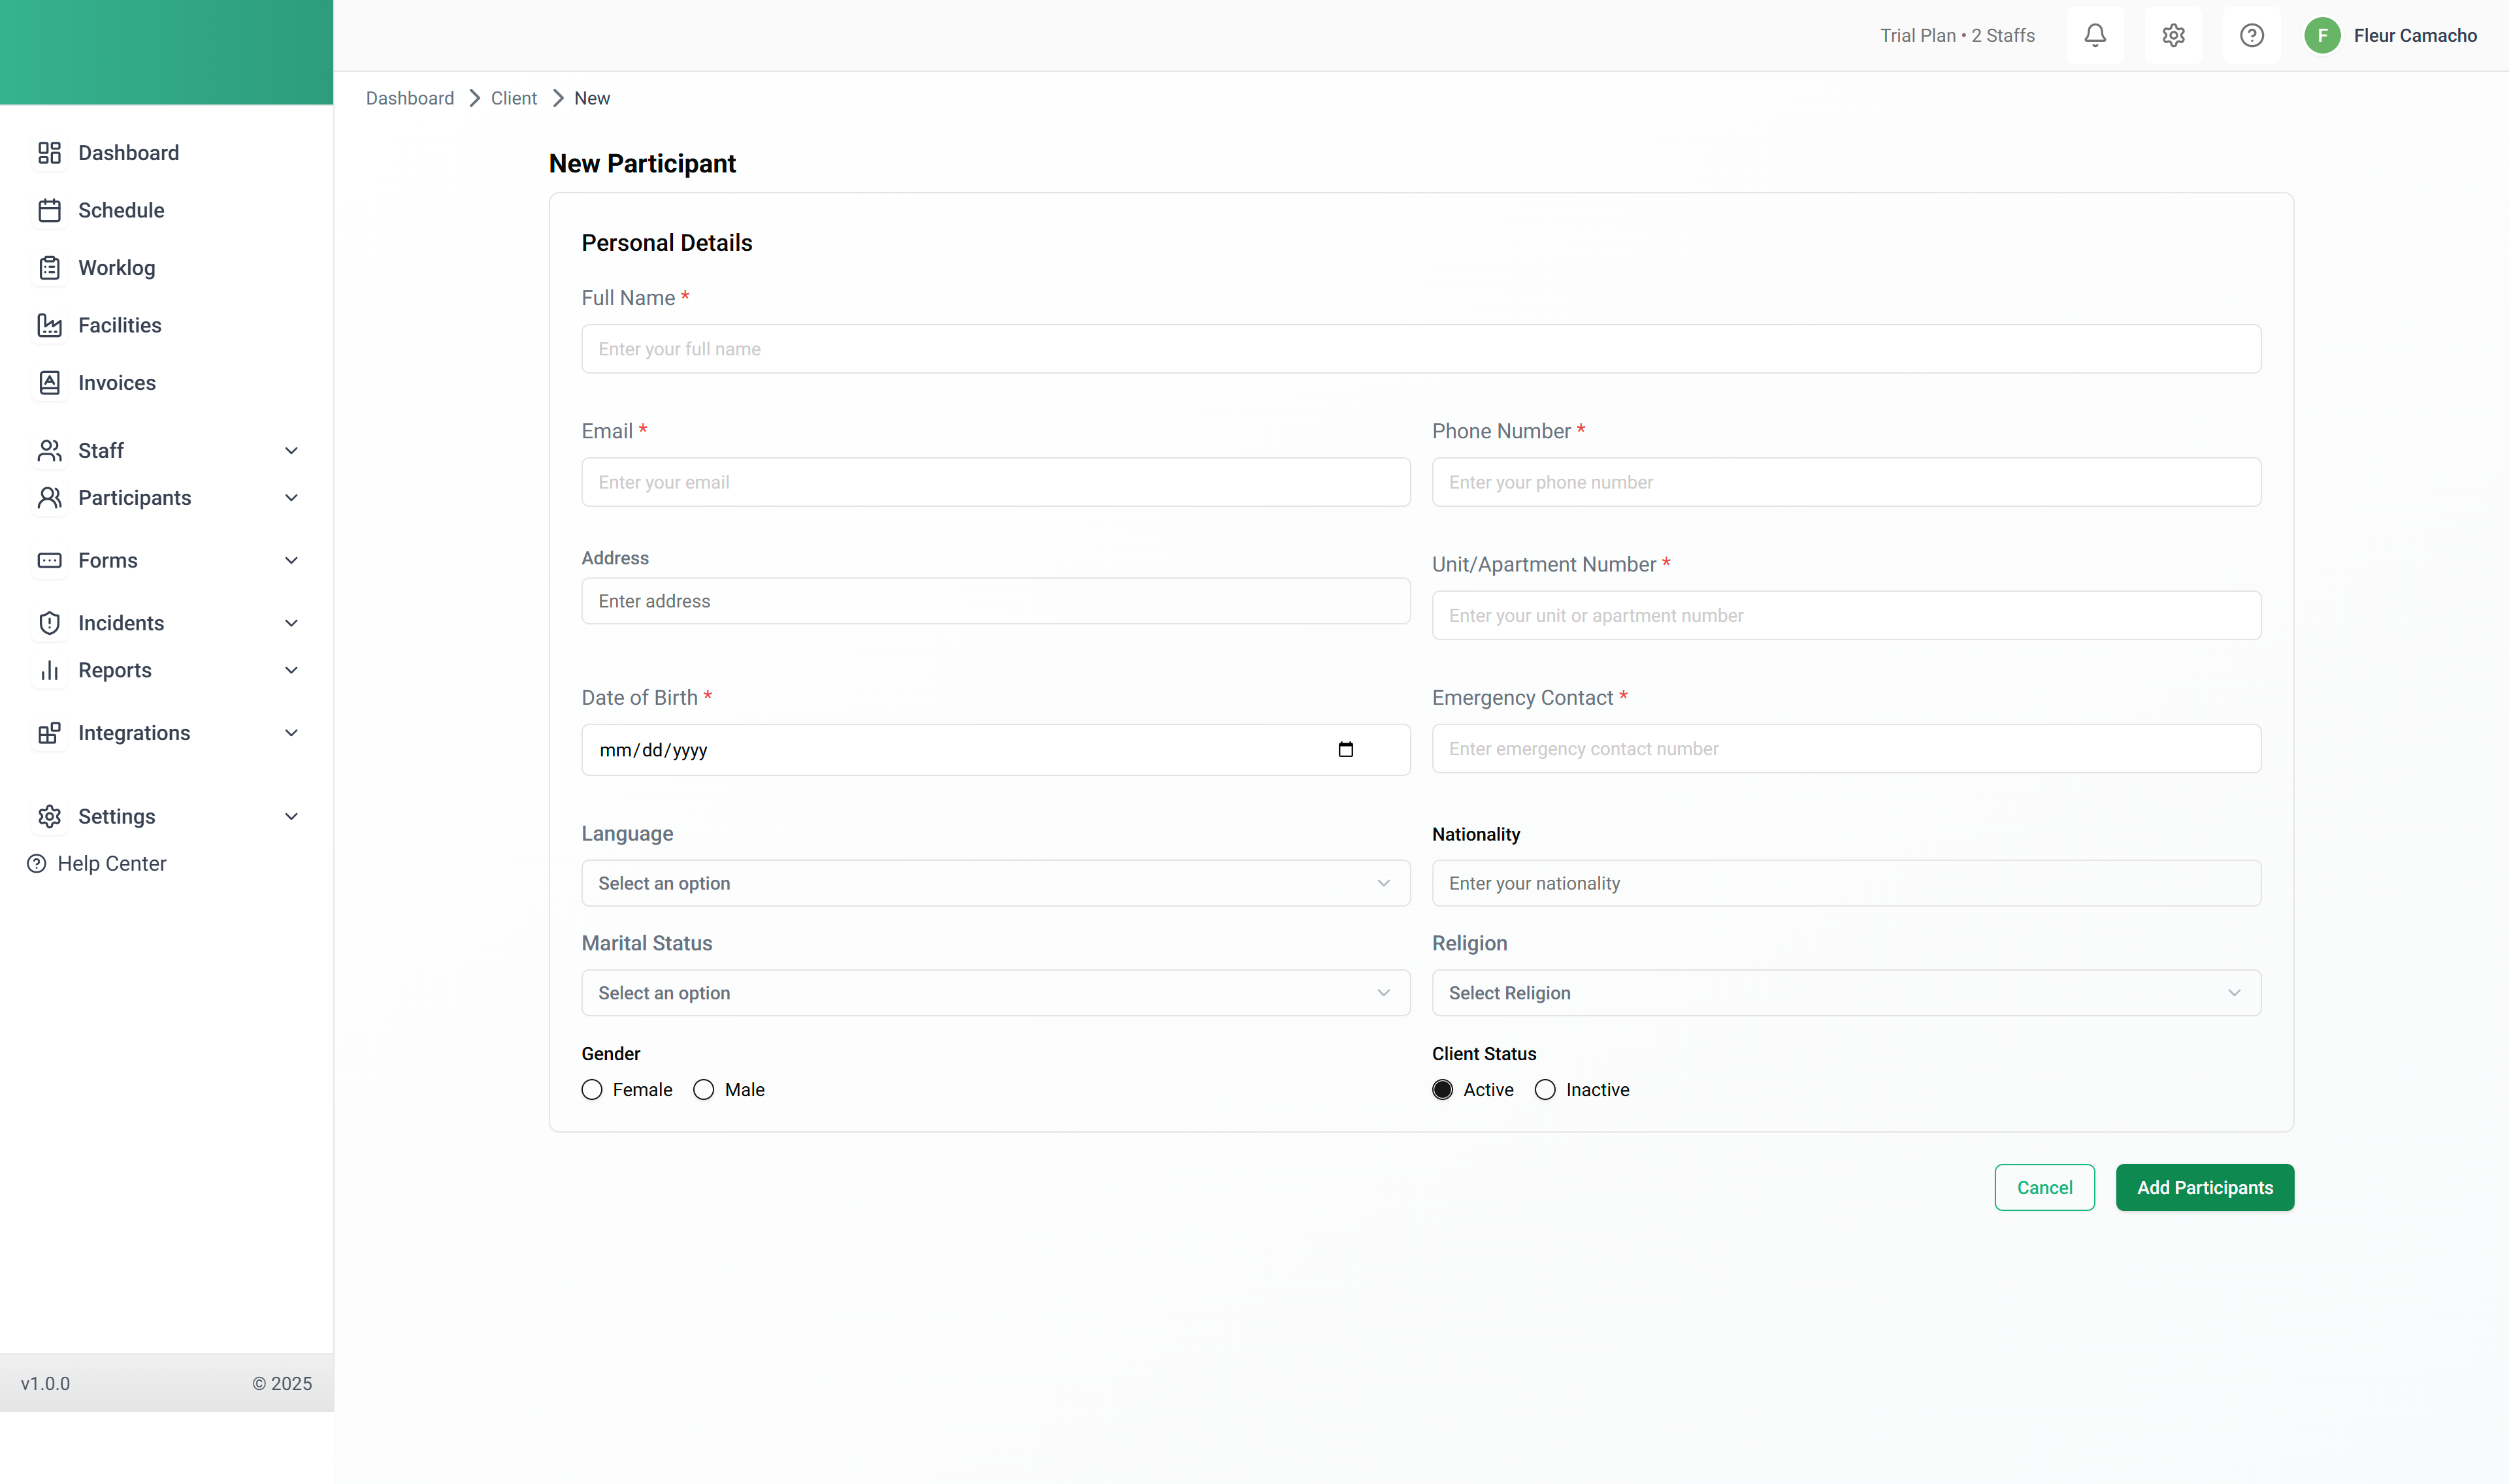
Step 3: Save the Participant
After filling in the details, click the Add Participant button.
A confirmation message will appear, and the participant will now be visible in the Participants List.
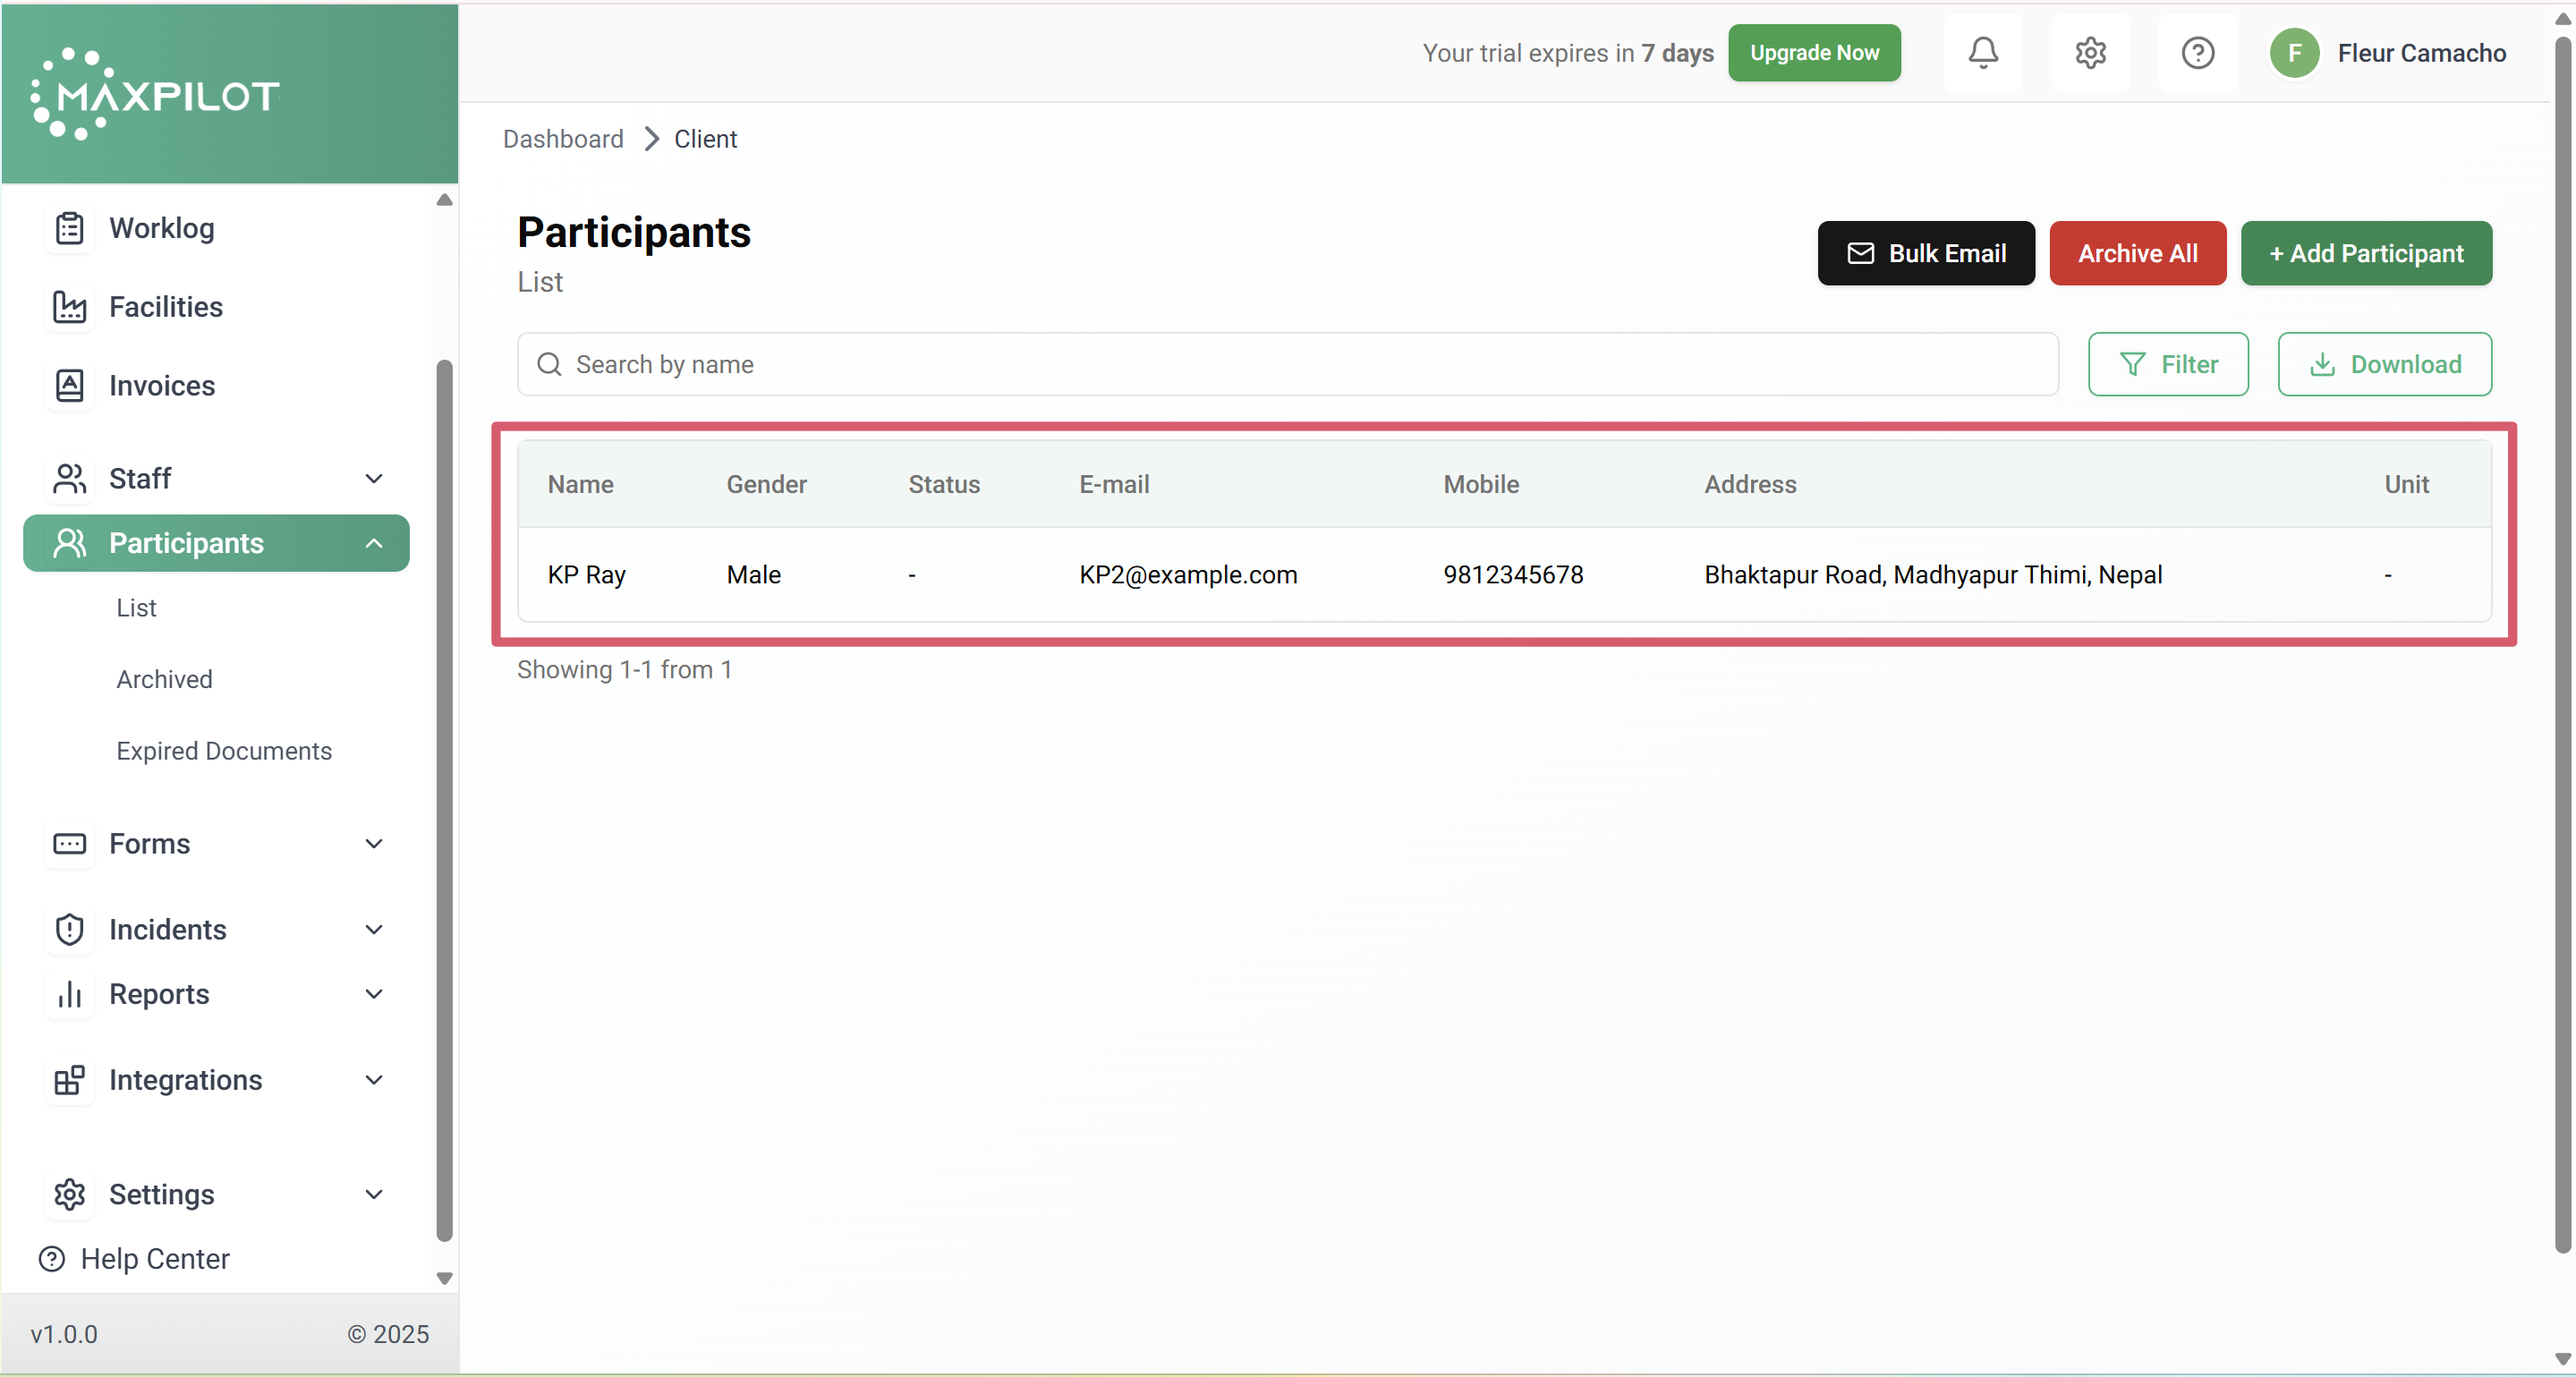
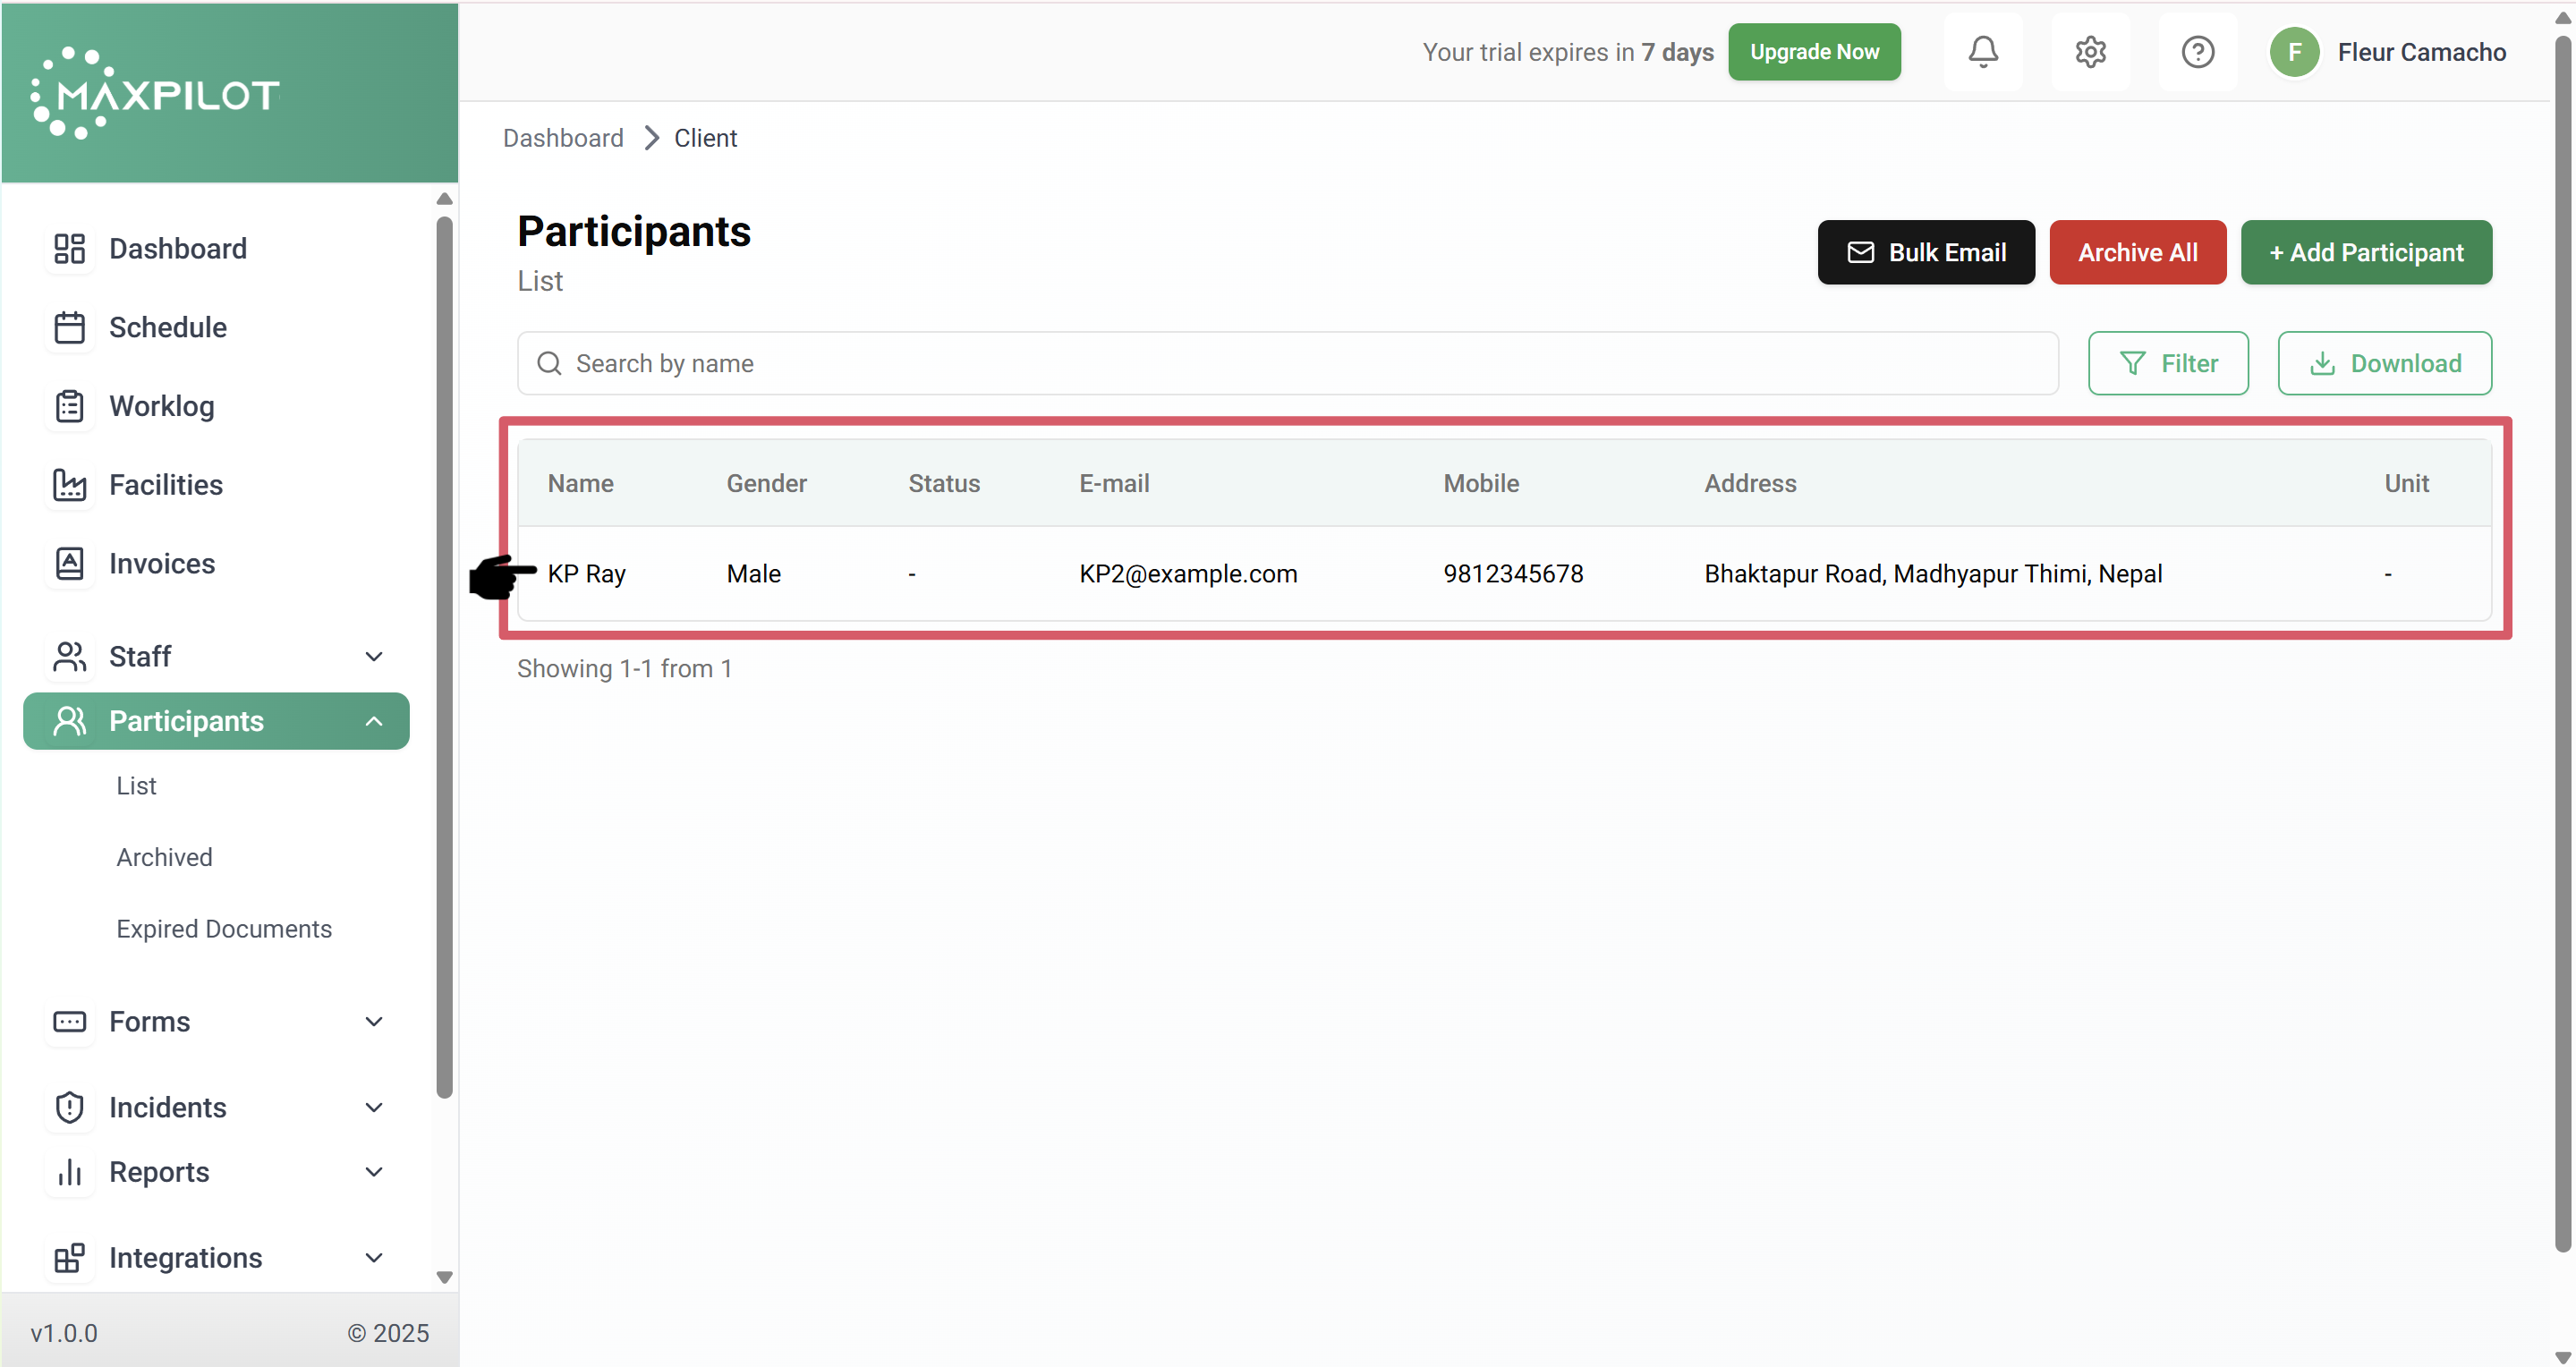
Step 4: Verify the Entry
You can now see the newly added participant in the list with details such as:
This confirms that the participant has been successfully added to the system.